TUTORIAL: HOW TO CREATE YOUR OWN PARAGAMI 3D WALL ART FROM PAPER
STEP 01-B / Plotter
-

PREPARE THE DATA
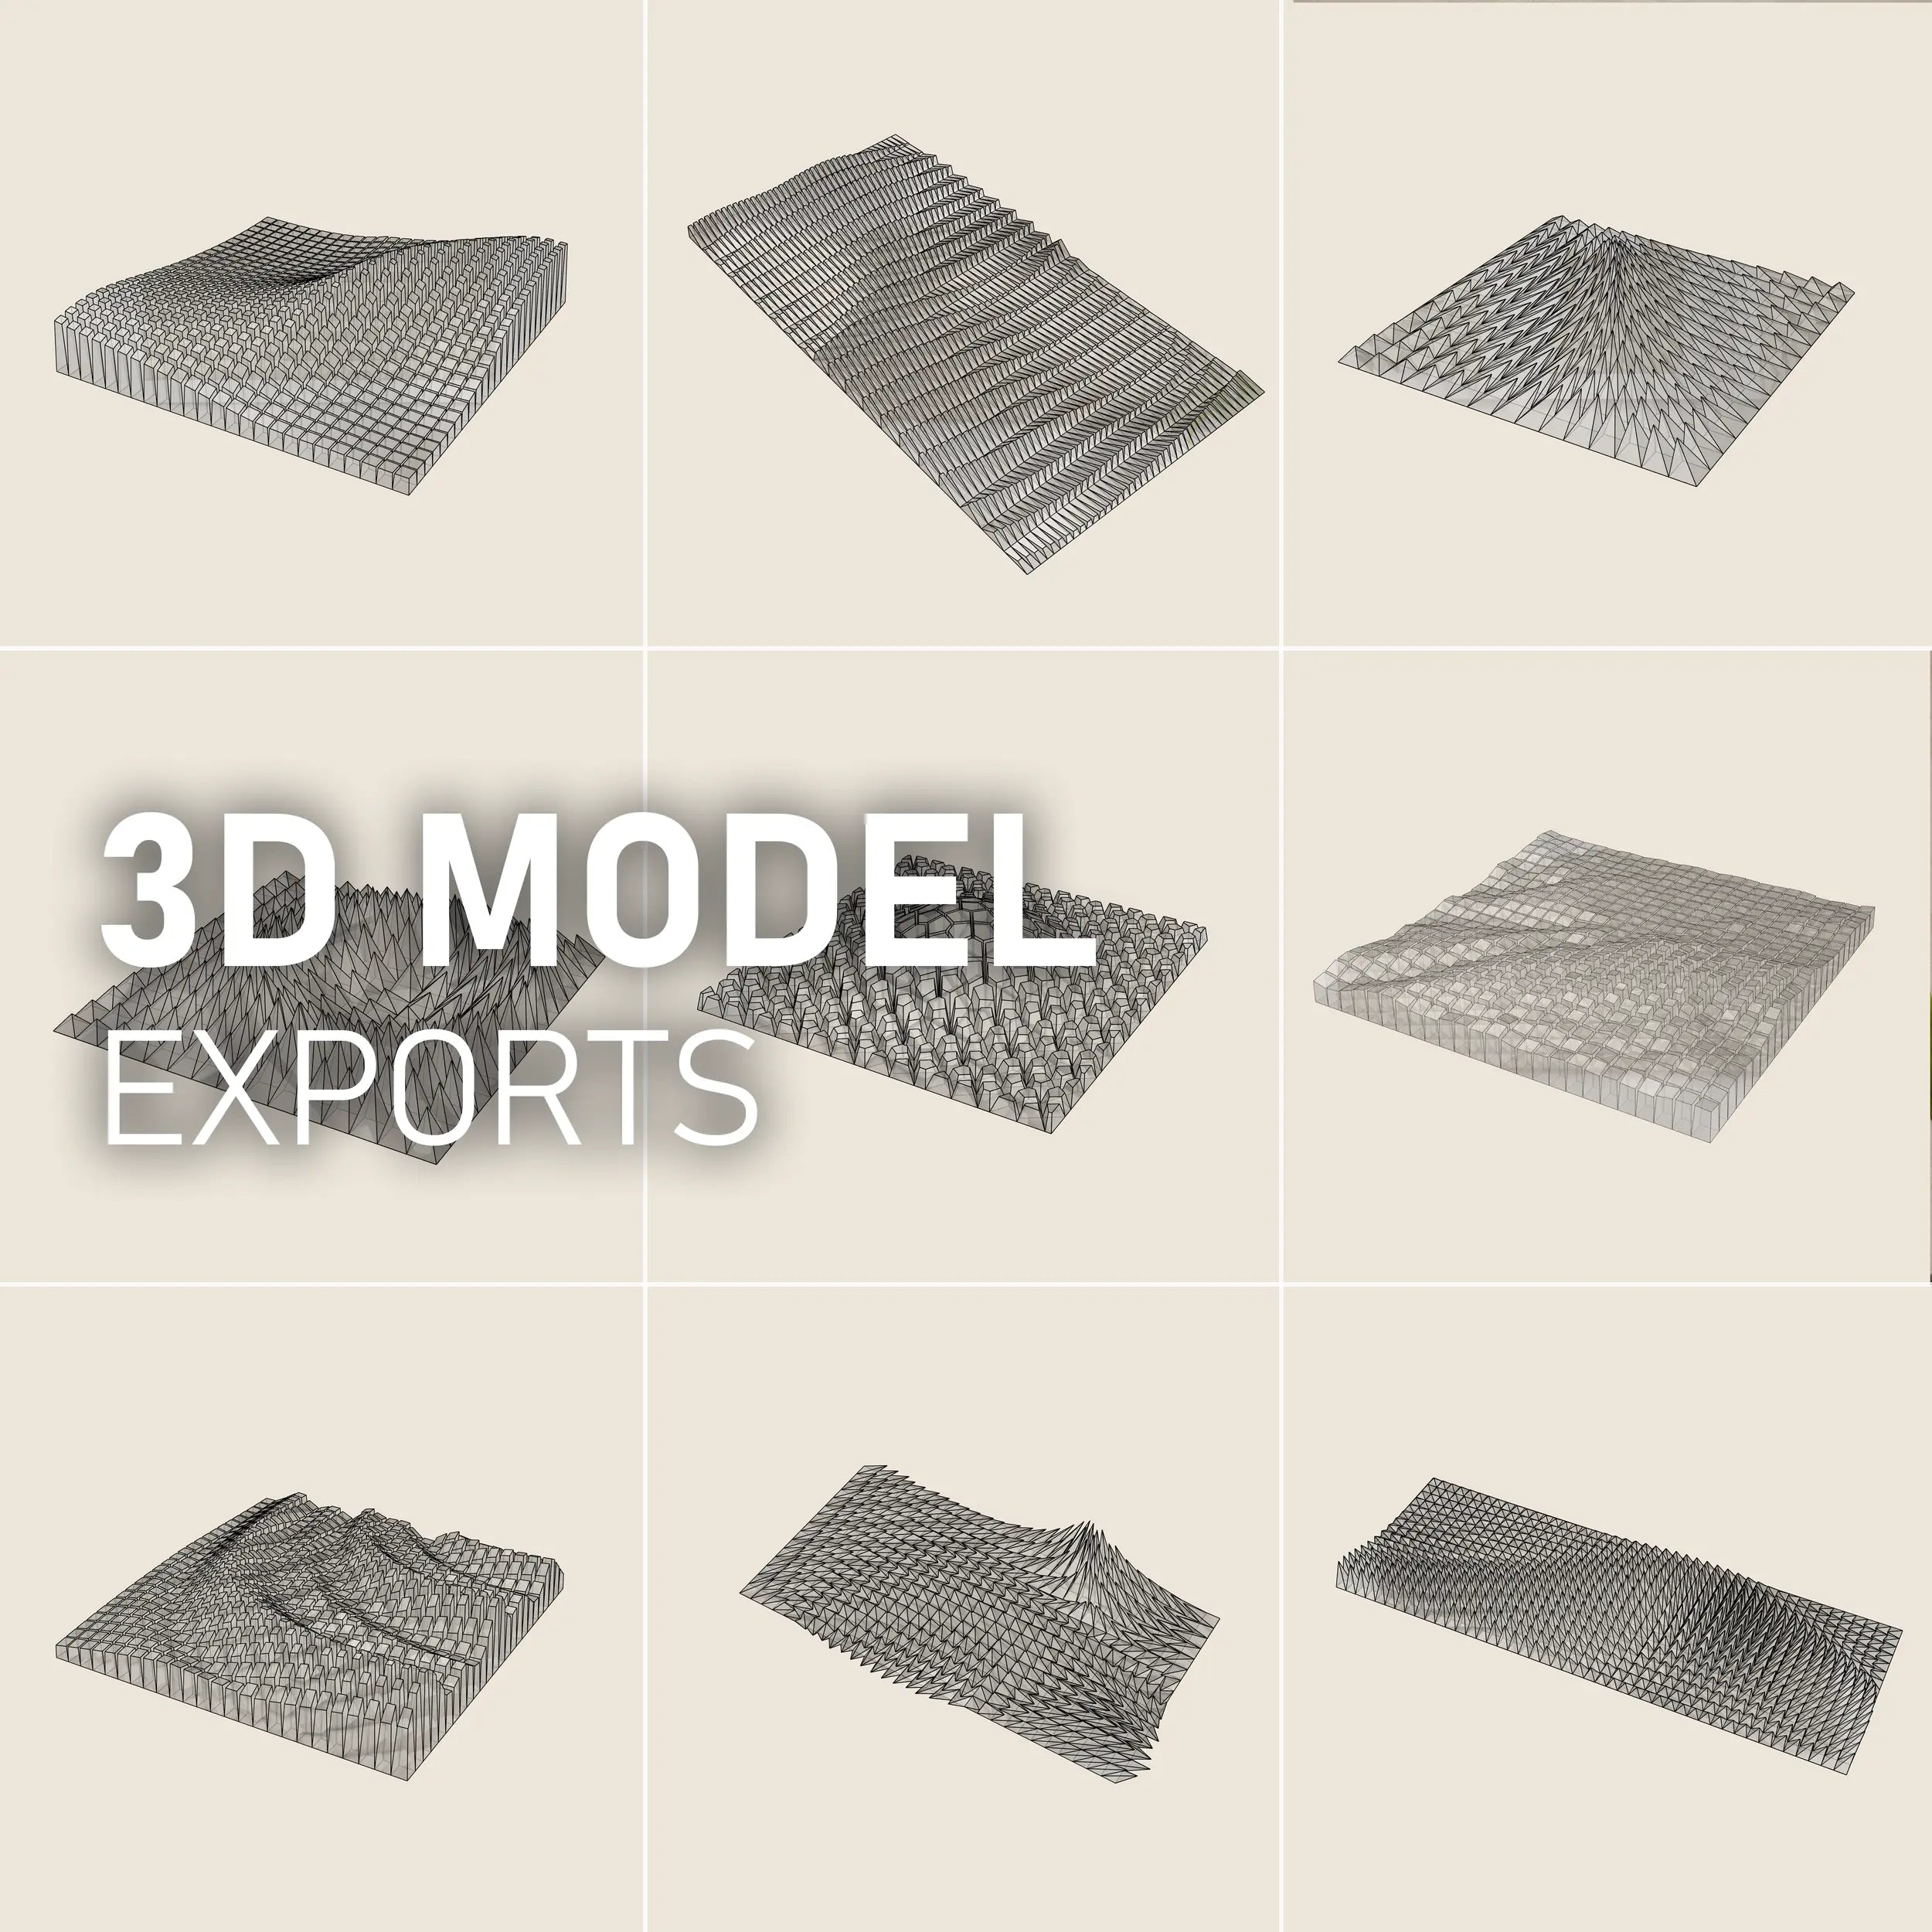
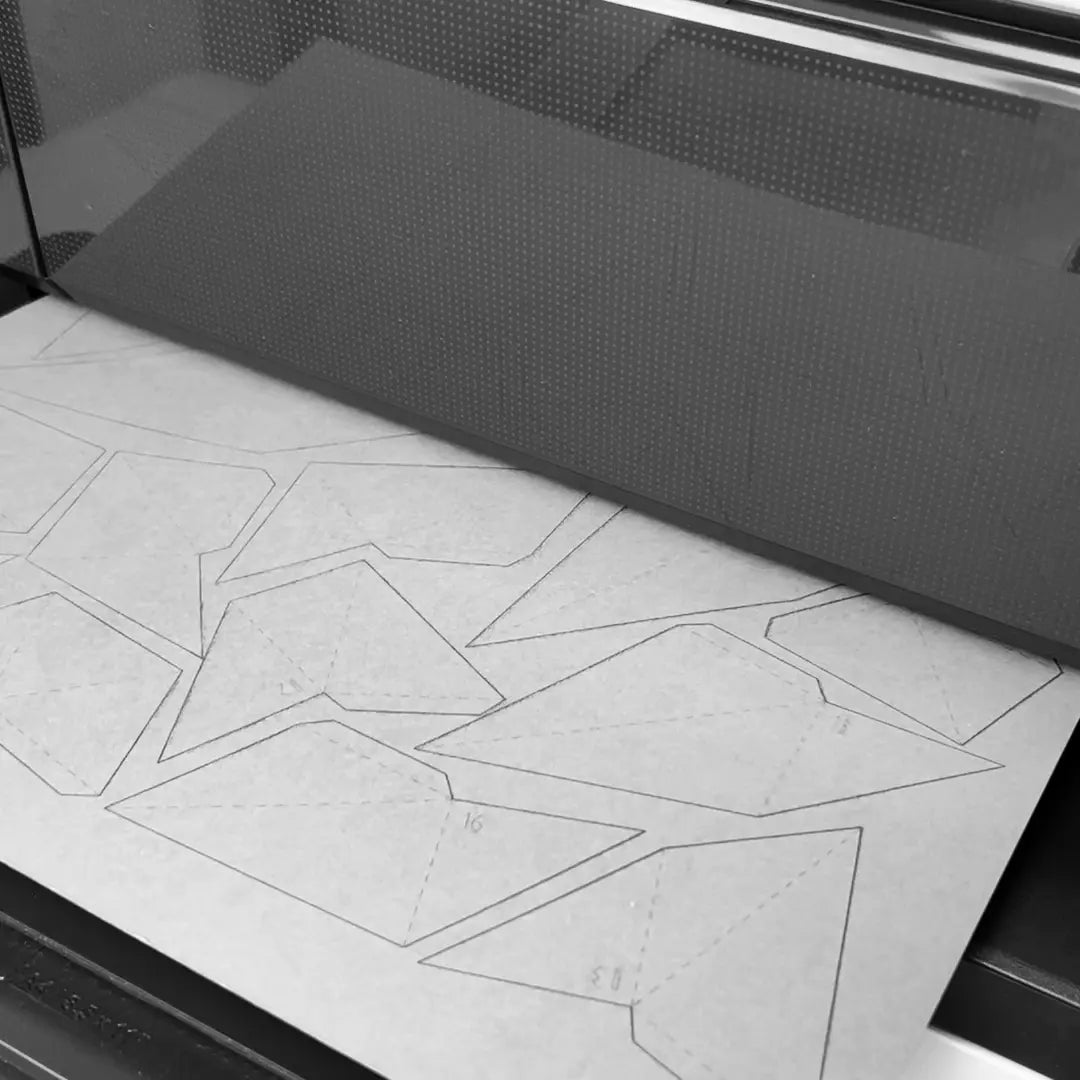
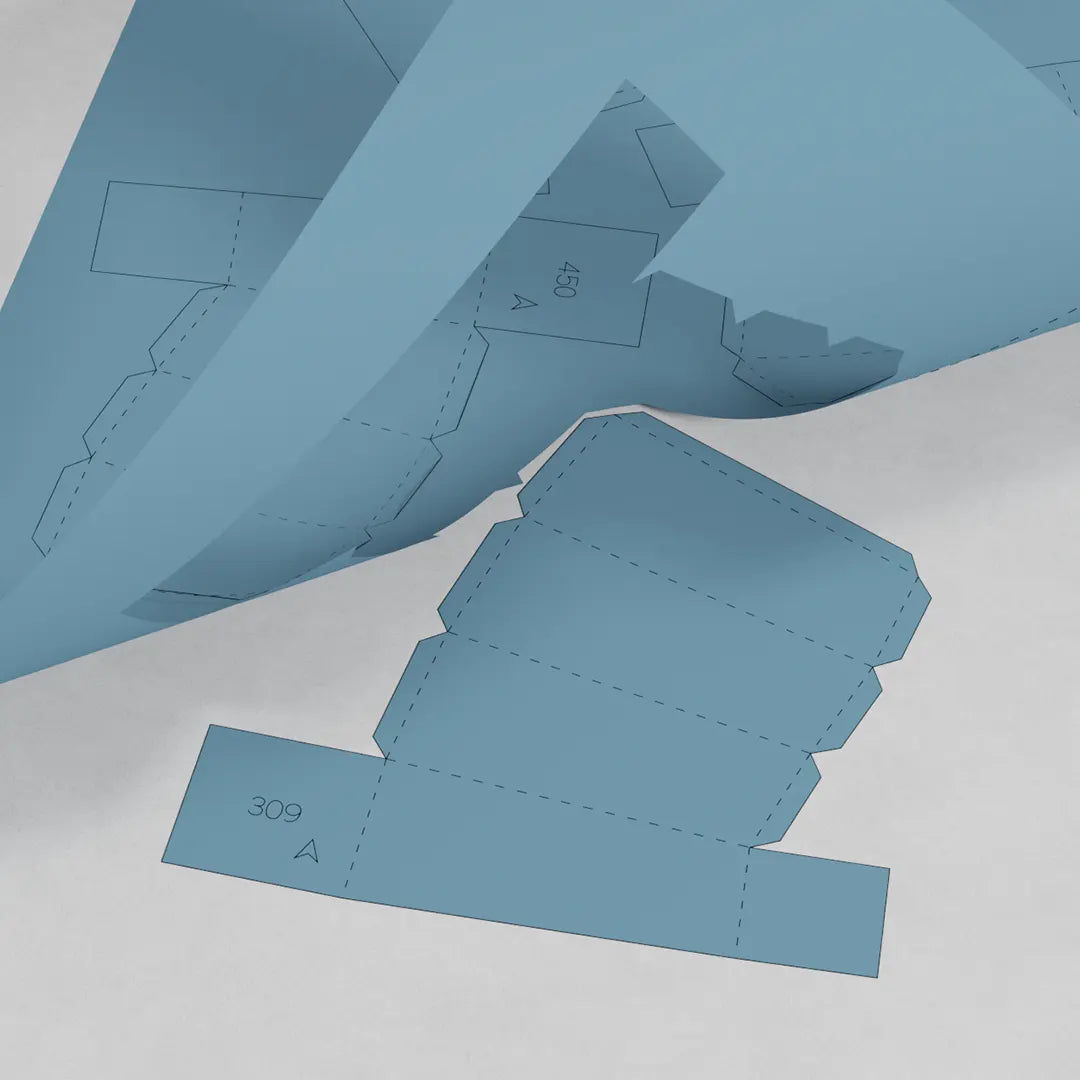
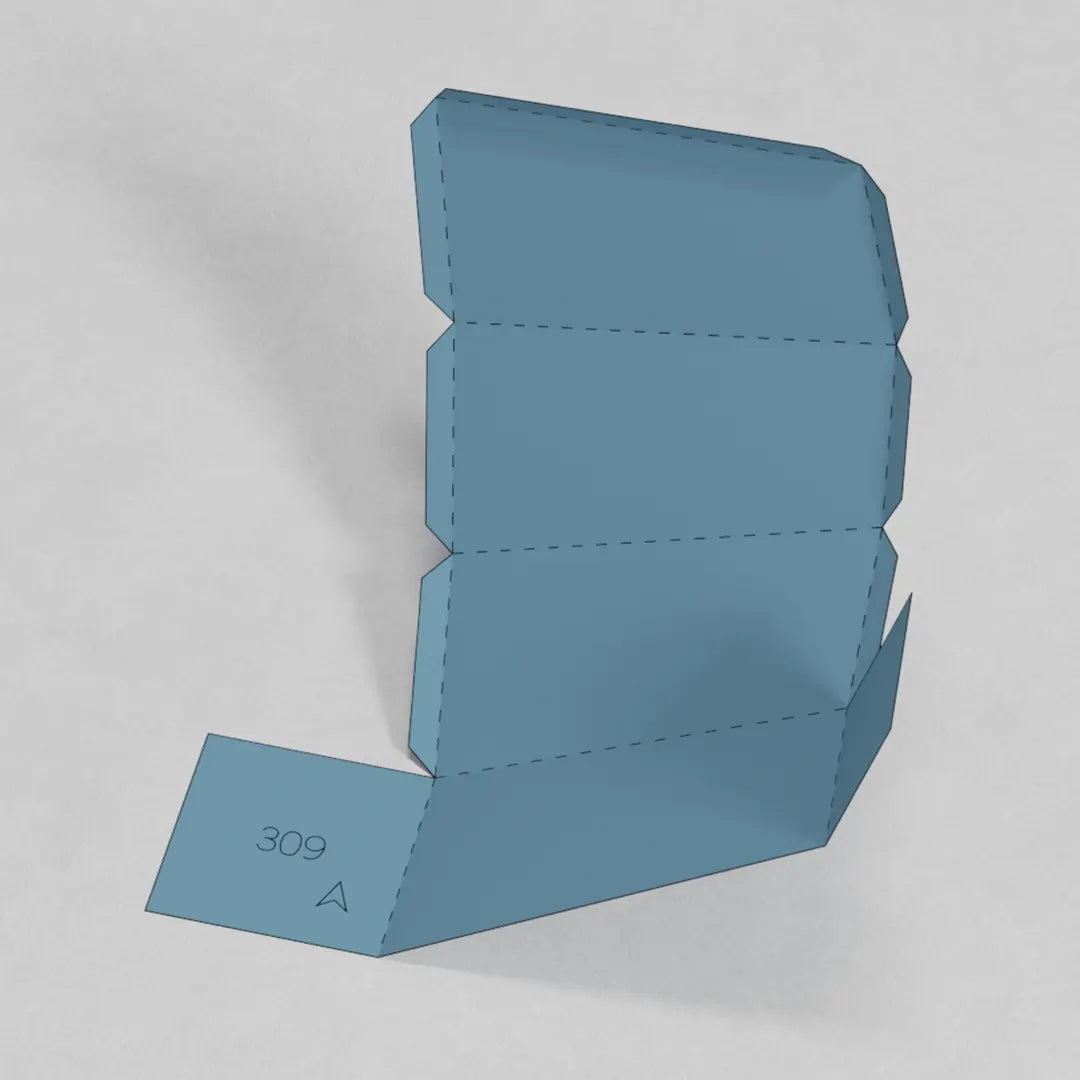
LEARN HOW TO SET UP SILHOUETTE CAMEO 4Download the enclosed DWG/DXF file. Find a print shop with a plotter or use your own desk-top one (Silhouette Cameo). The data are vectors and can be easily re-arranged to the size of the working area of the cutter. You will have to import it into your plotter program and set up the cutout.
-
DIFFERENT SETTINGS
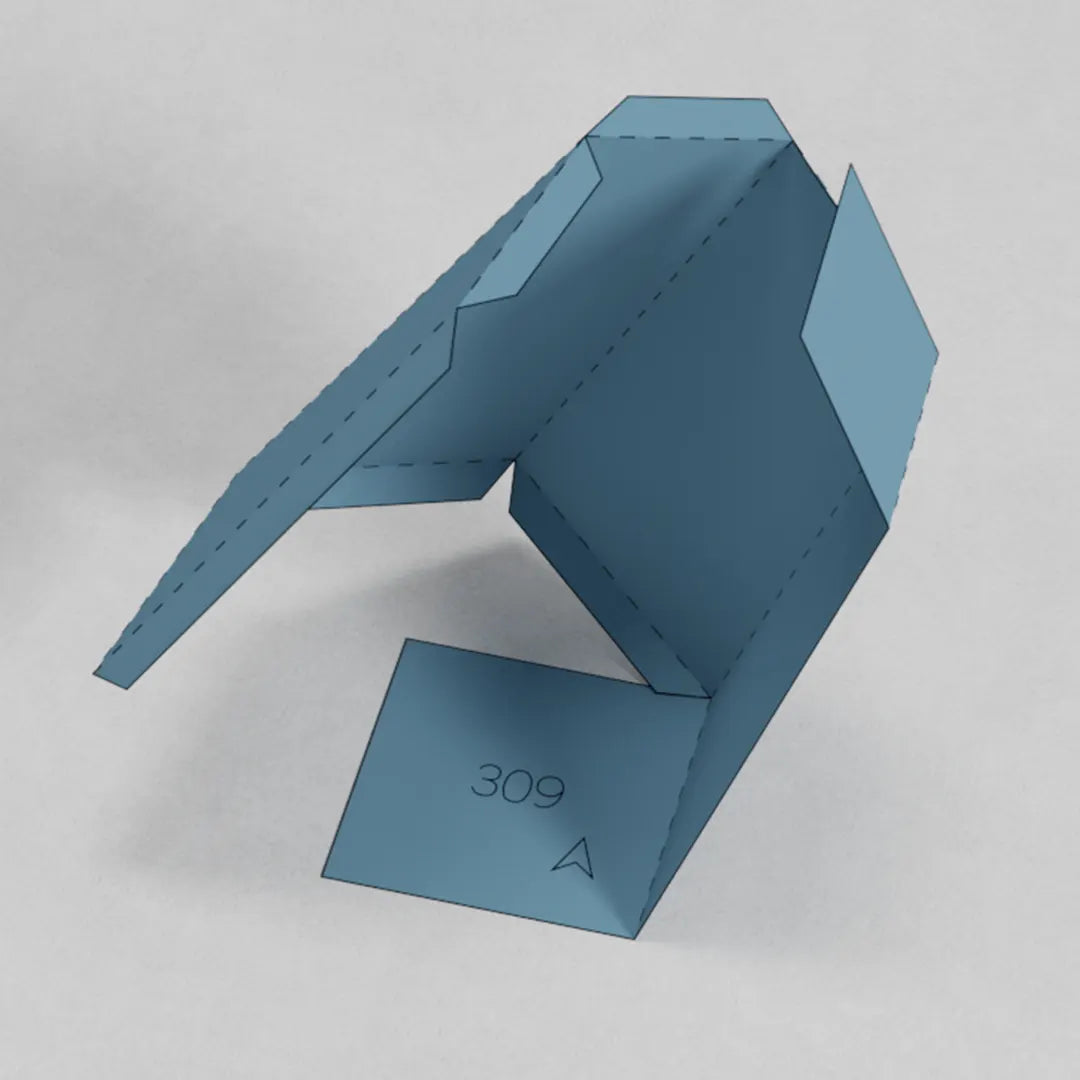
Set up different settings for the lines. The Outline and the Numbers should be cut all the way through, but lines for folding just a bit or with a dashed or dotted line. The different cut setting is used for different materials and thickness. The outline of the shape and lines for foldings are on different layers. This gives the option to plot them with different settings (e.g. dashed, less power), which makes assembly easier.
-
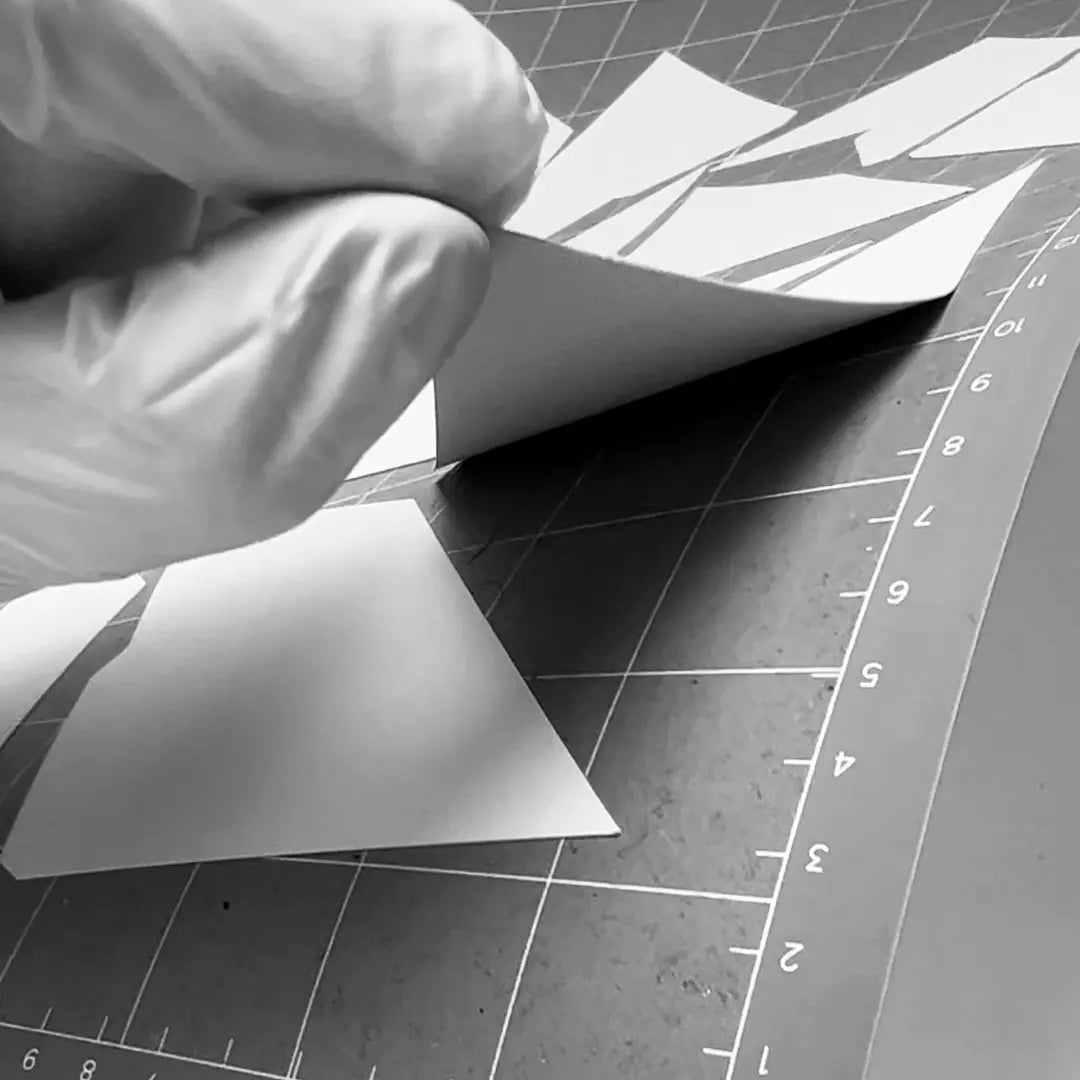
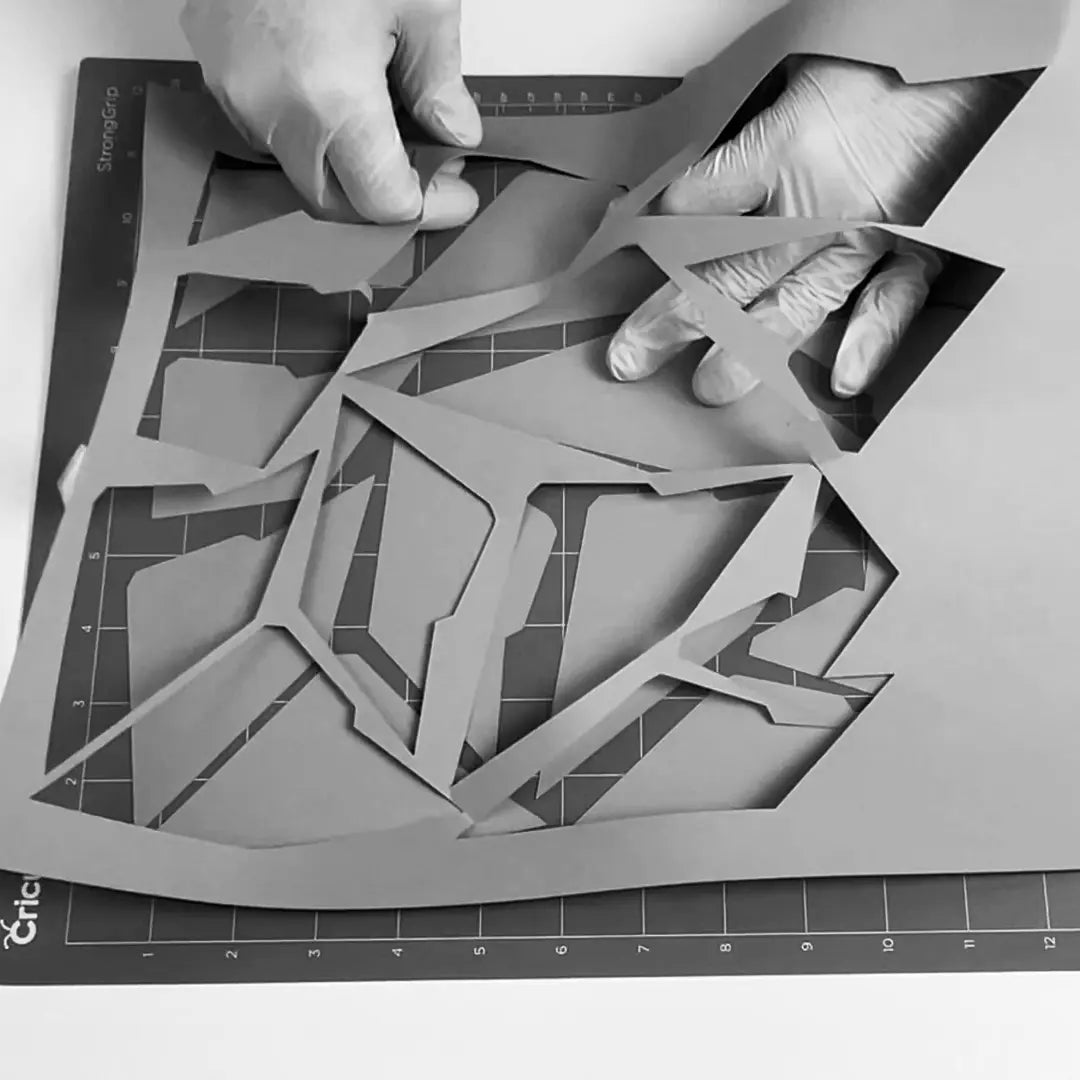
PEEL OF THE SHAPES
Once plotting ready, carefully peel off the shapes. Do not bend or fold the paper, bend the cutting mat instead! The paper will pop up easily.


STEP 01-A / Scissors/Scalper
-
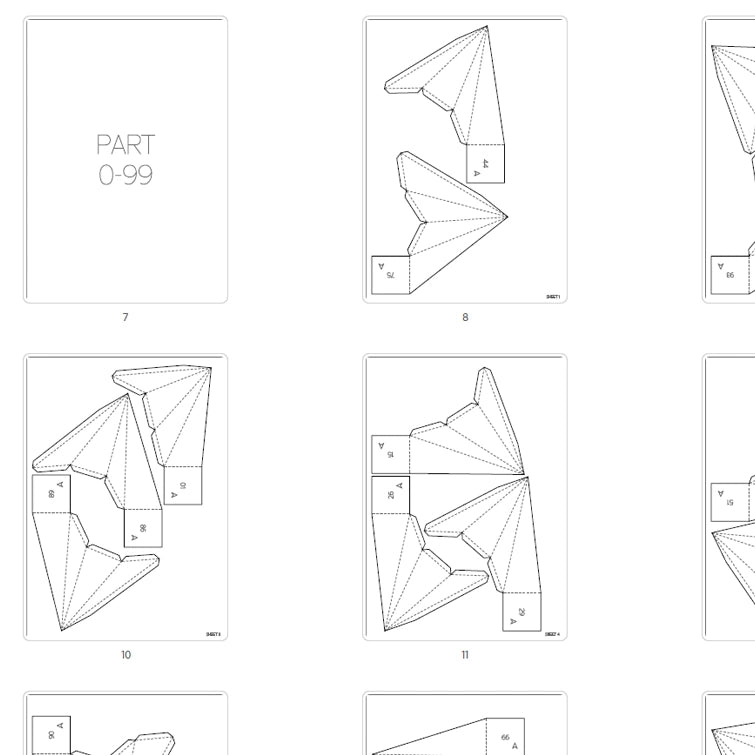
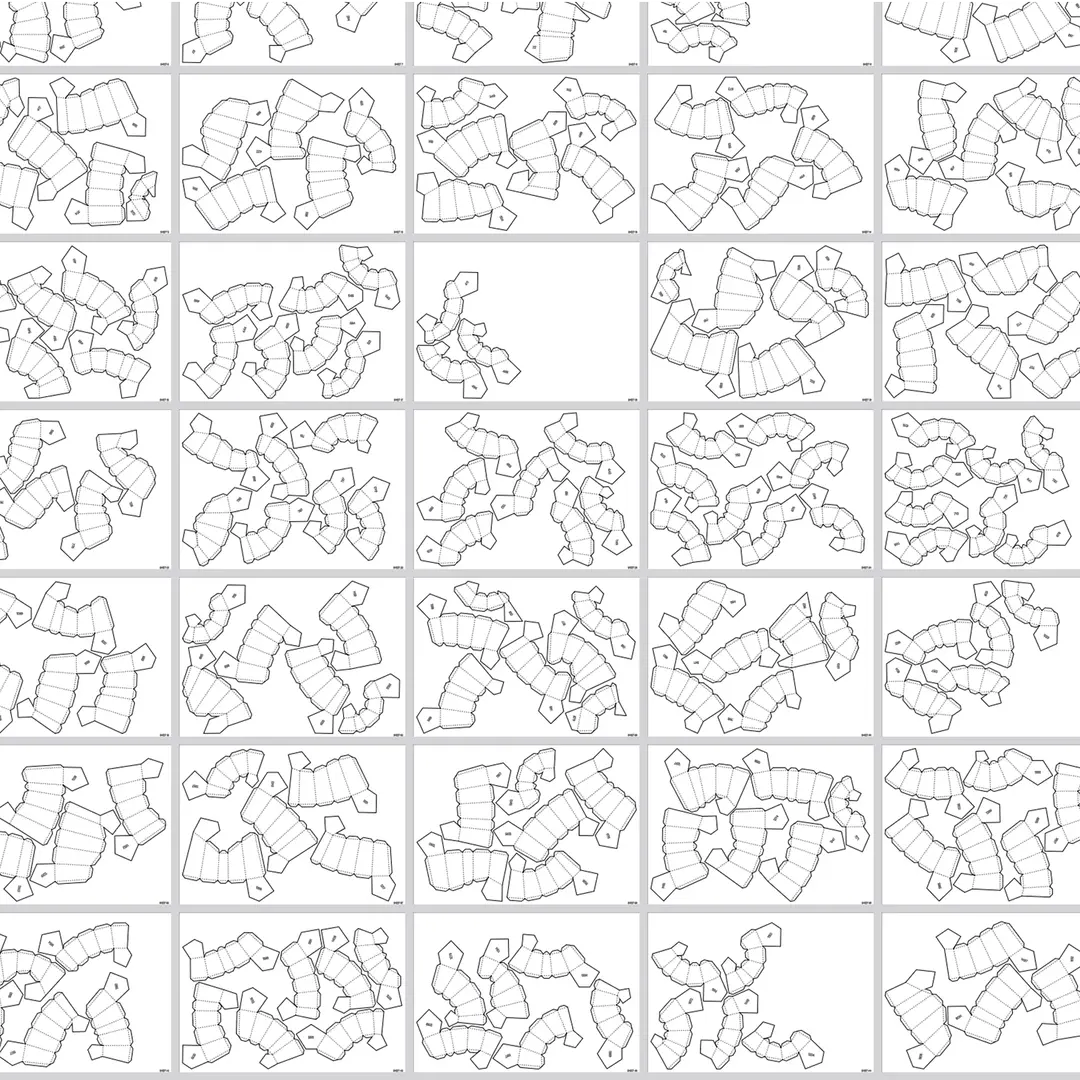
PRINT THE LAYOUT SHEETS
READ MORE ABOUT PAPERDownload the PDF and print the sheets on a regular printer. The paper size is A3 or A4 by default. We recomend to use colour paper 120g - 240g.
-
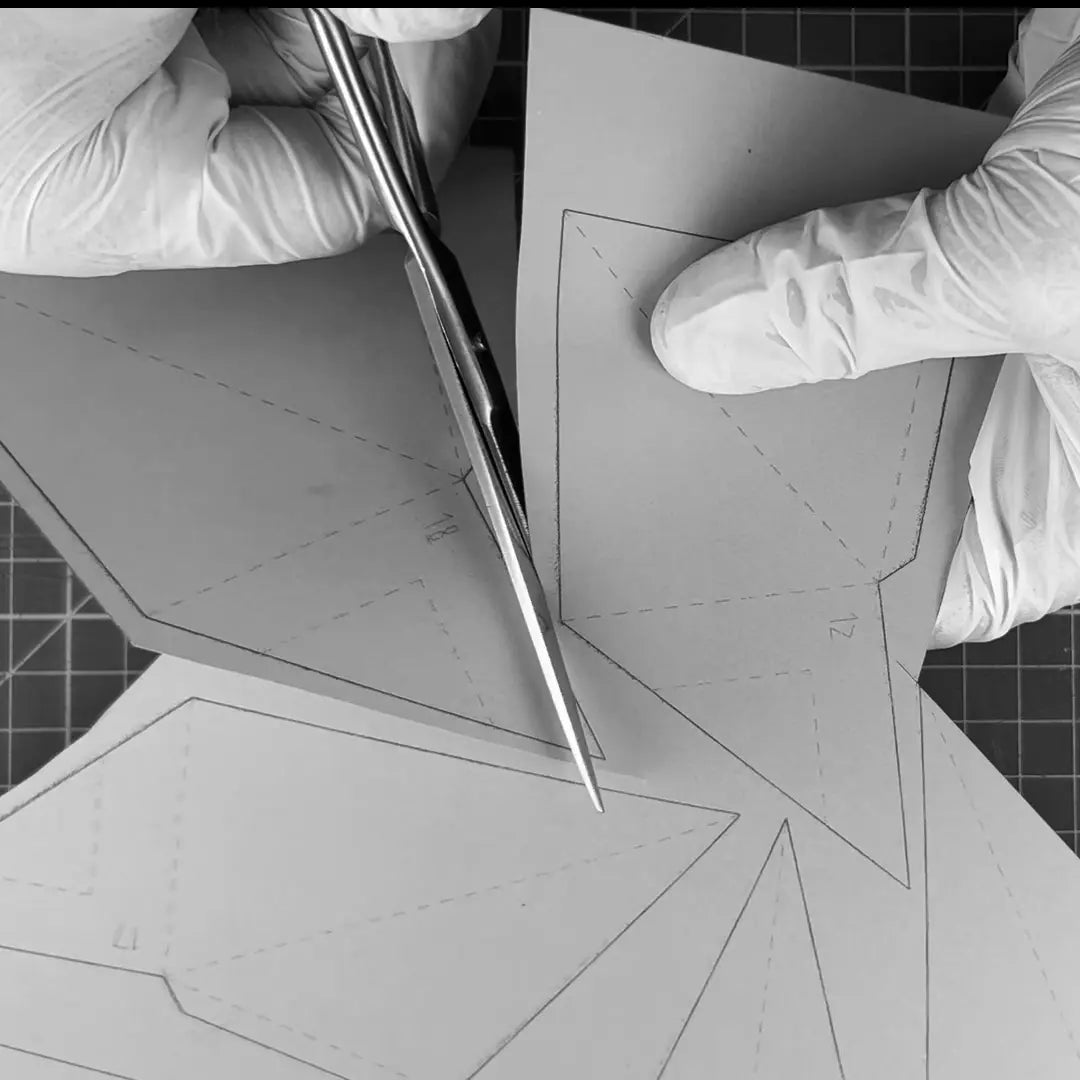
CUT OUT WITH SCISSORS
Carefully cut out all the shapes. It is easier to roughly separate individual shapes. And then precisely cut out each shape following the outline. It is easier manipulation.
-
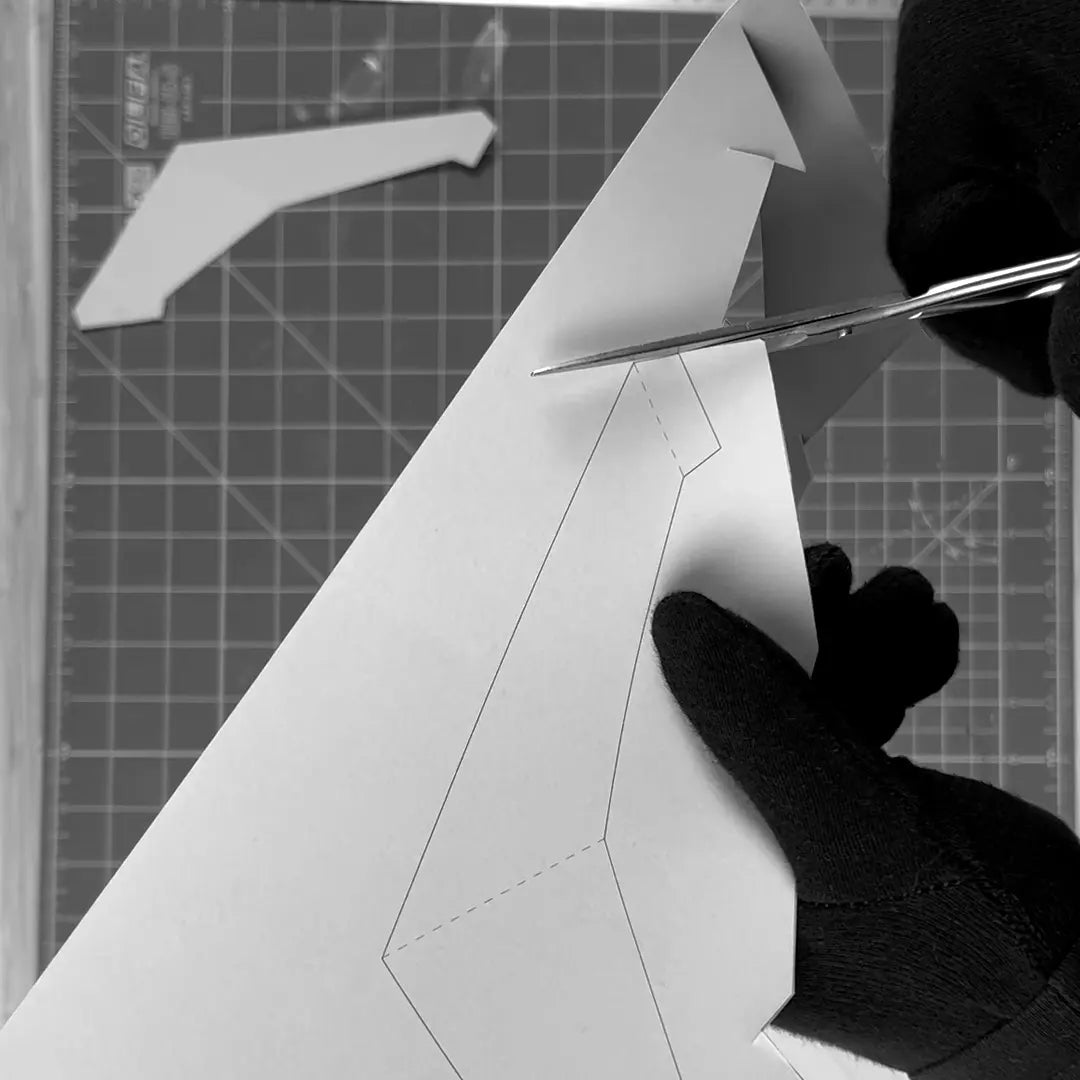
CUT OUT WITH A SCALPEL
Use a metal ruler to guide the blade. Be careful not to cut you fingers!
-
-
-


STEP 02 / PREPARATIONS
-
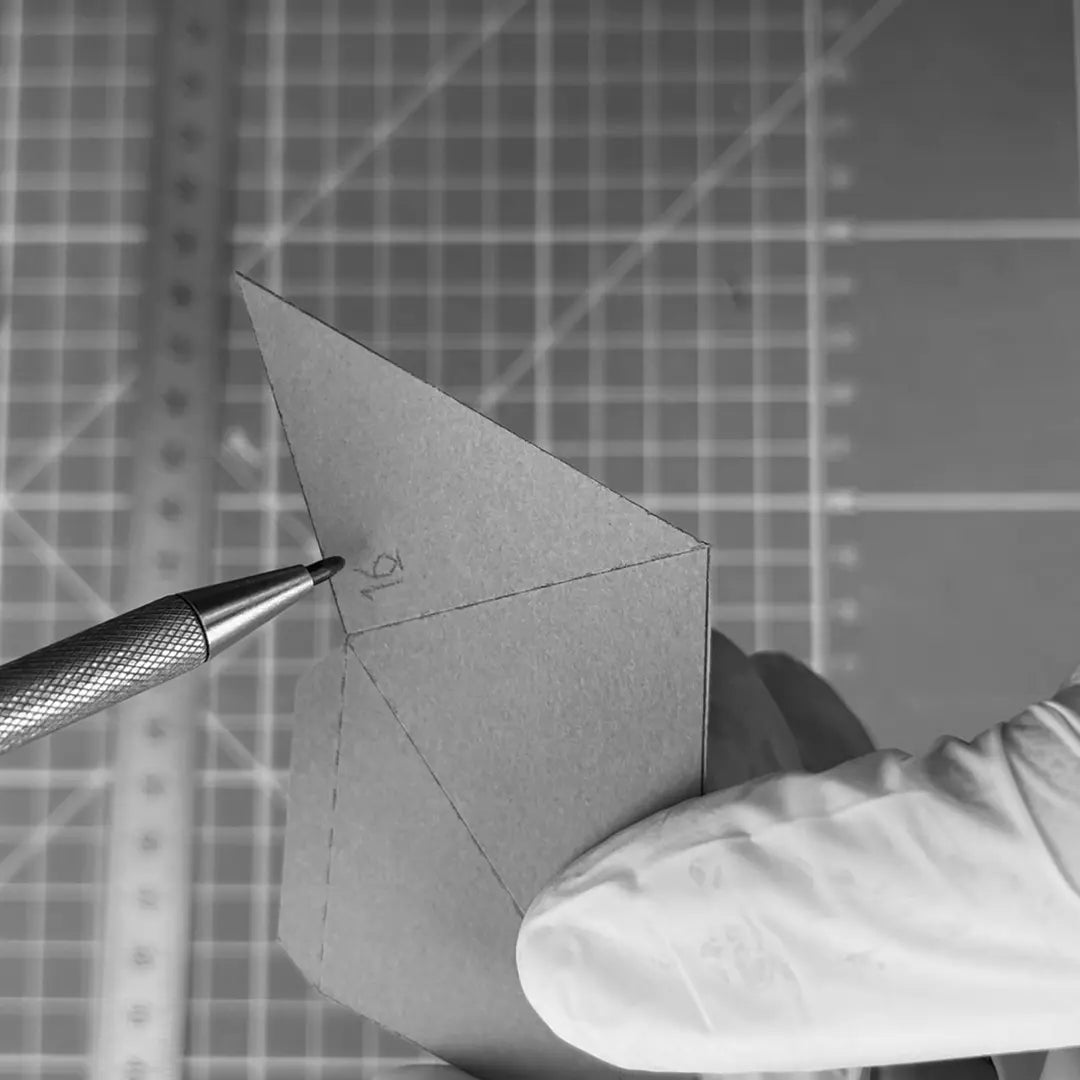
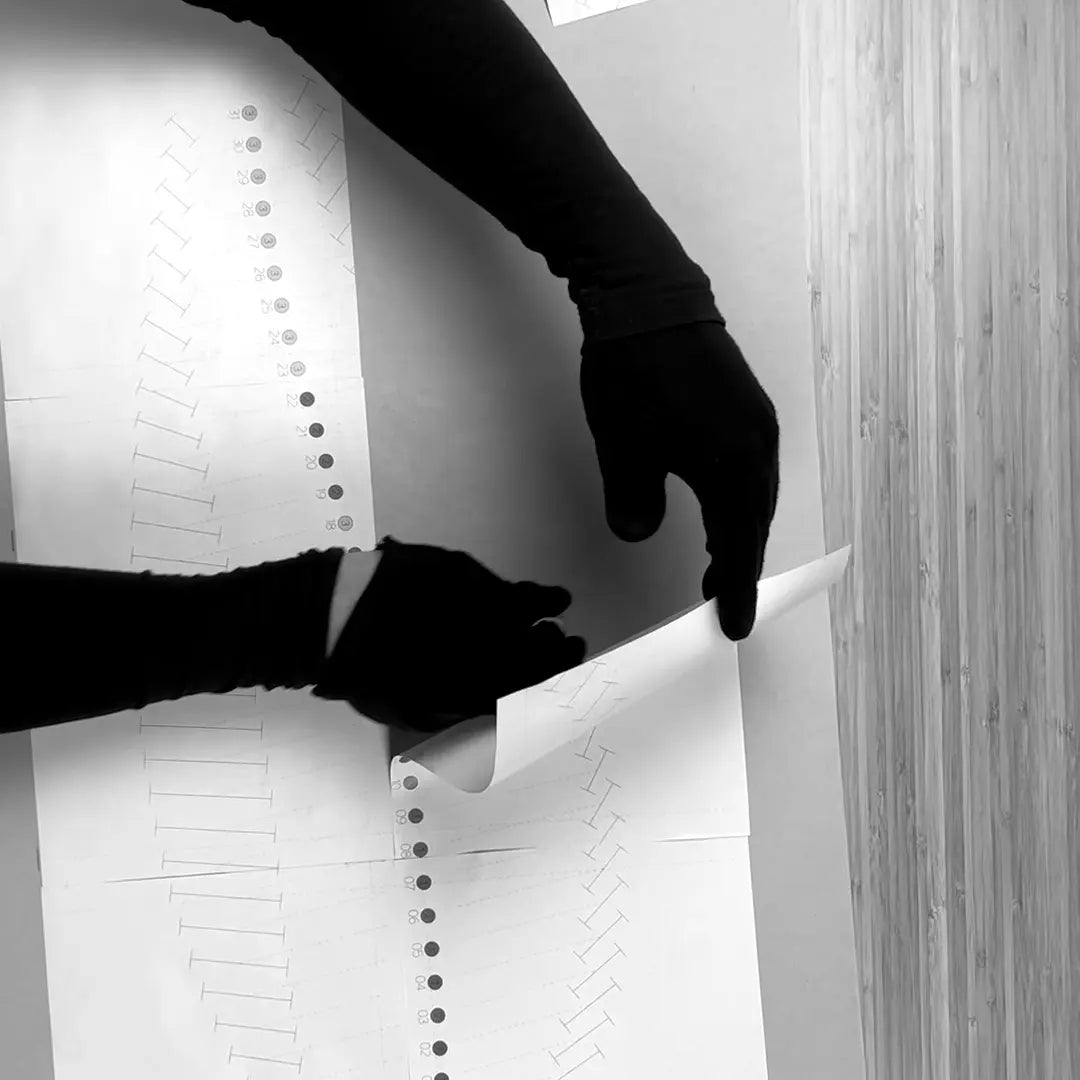
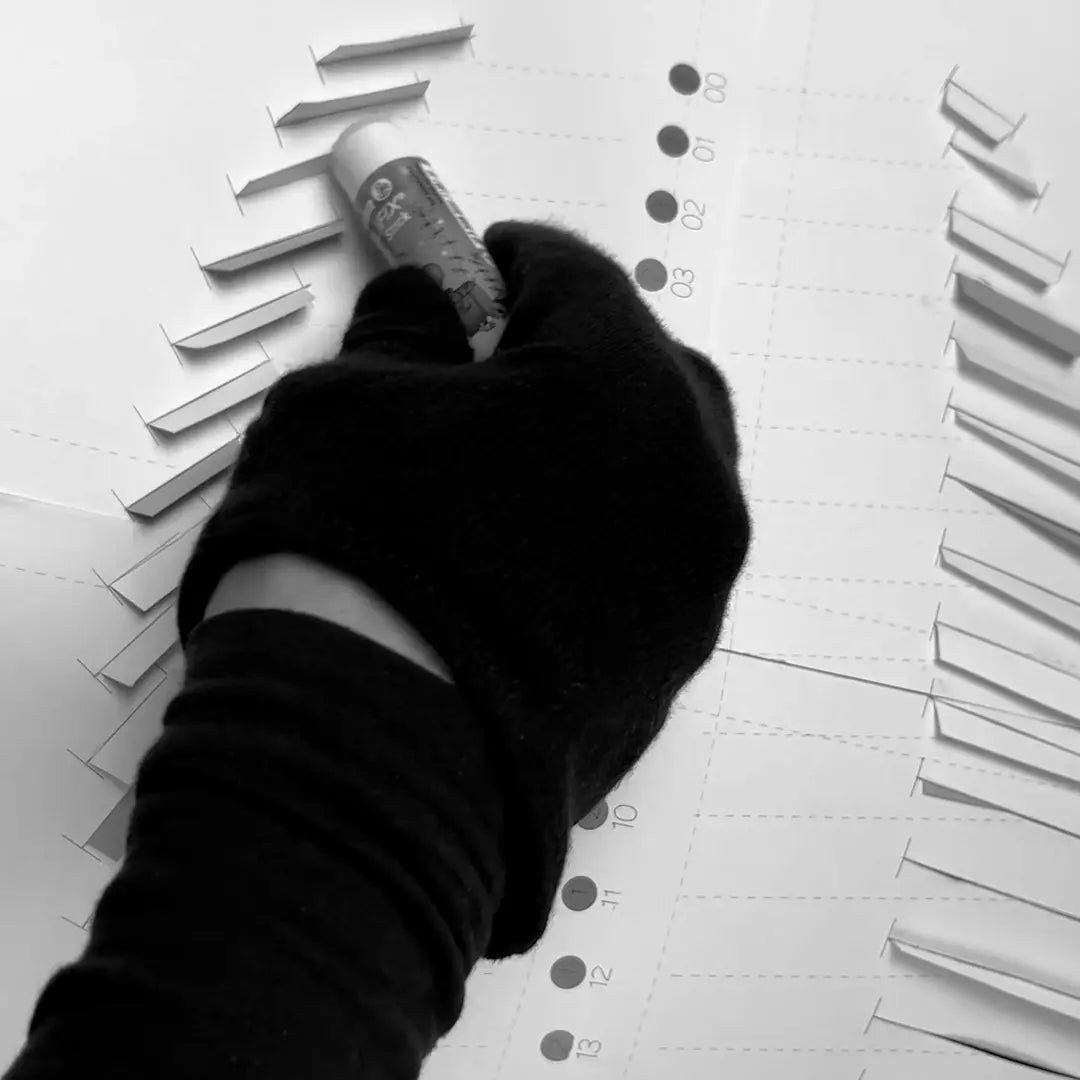
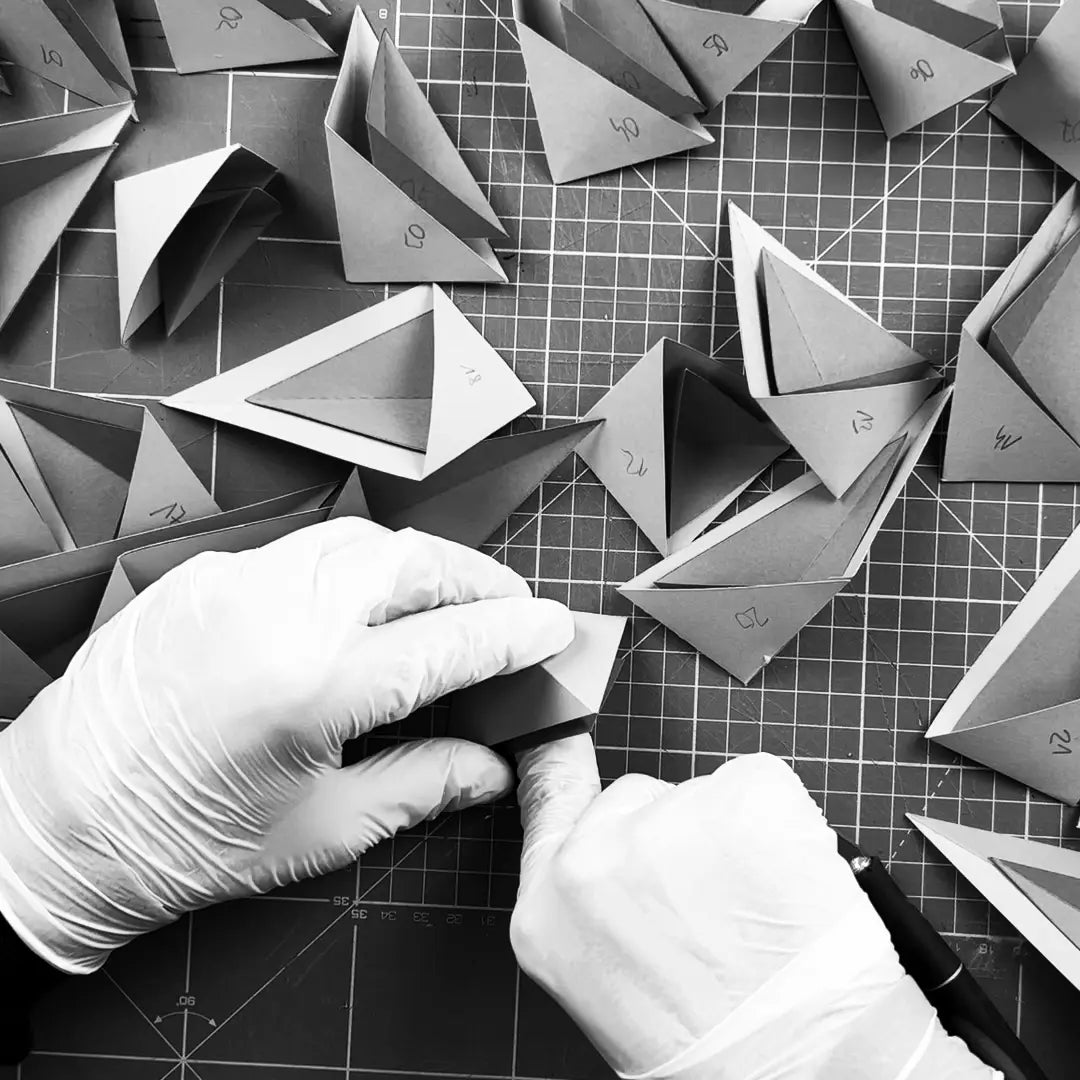
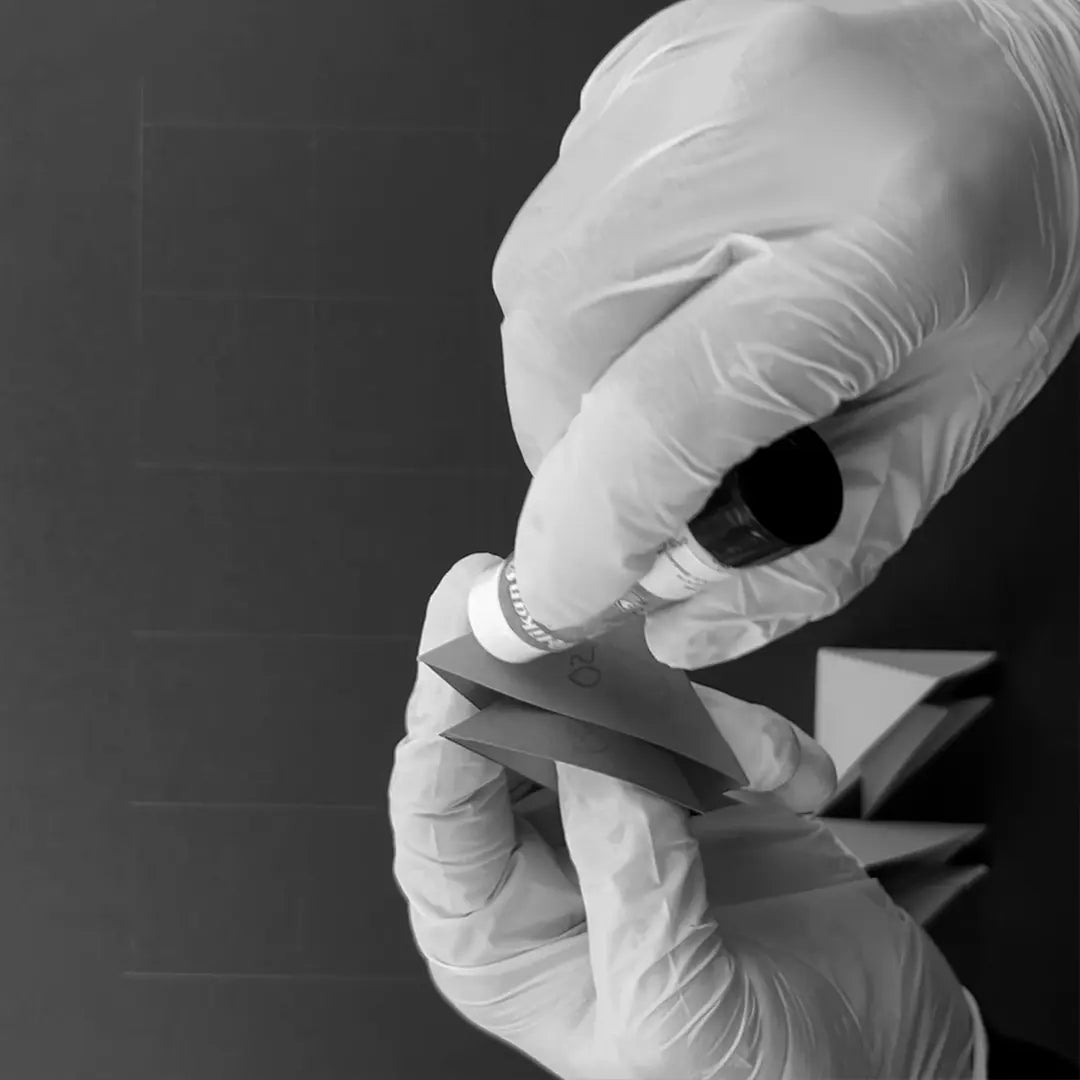
MARK DOWN THE NUMBER
Rewrite the number of the shape on the other (bottom) side. Once the shape will be folded-up and glued, the number will not be visible.
-
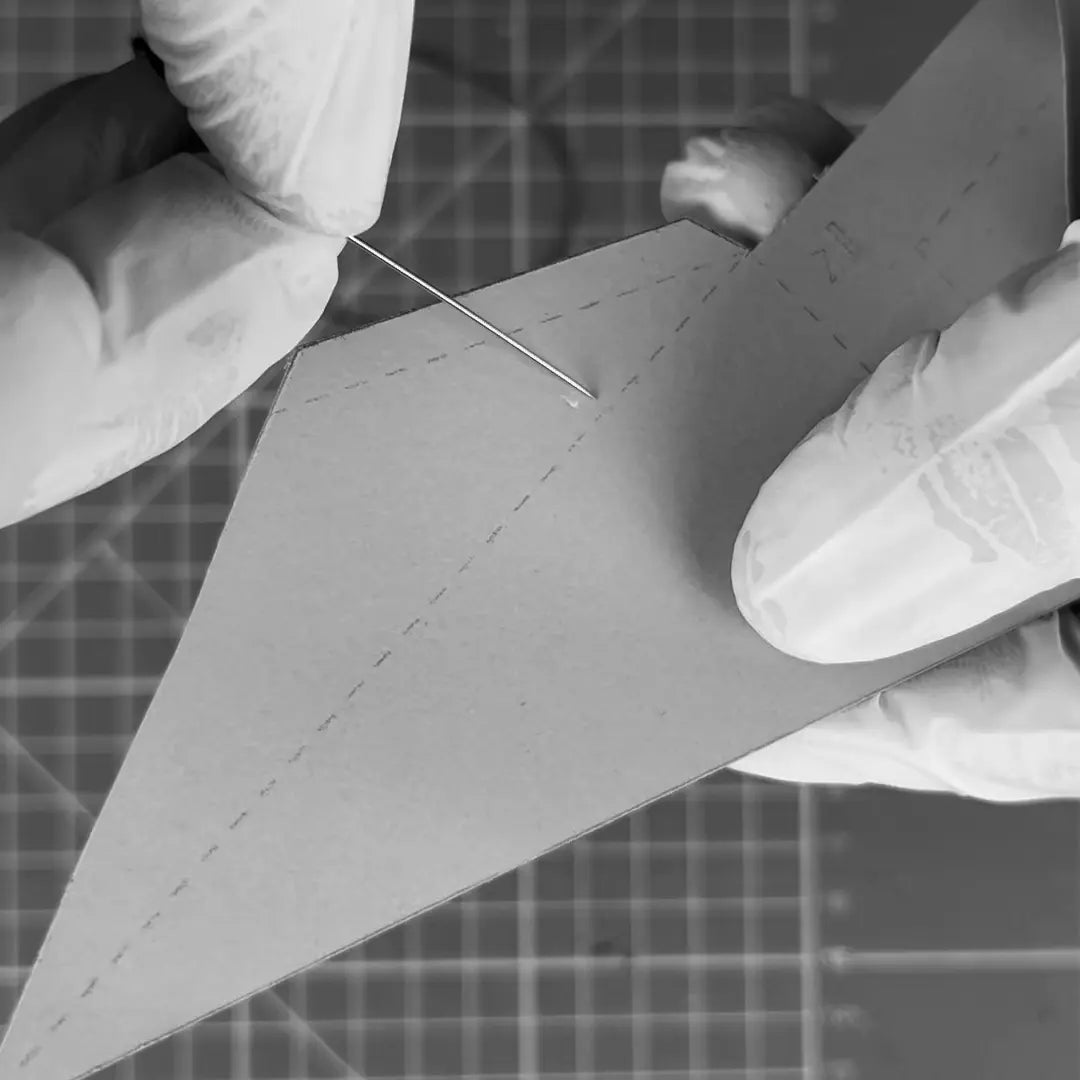
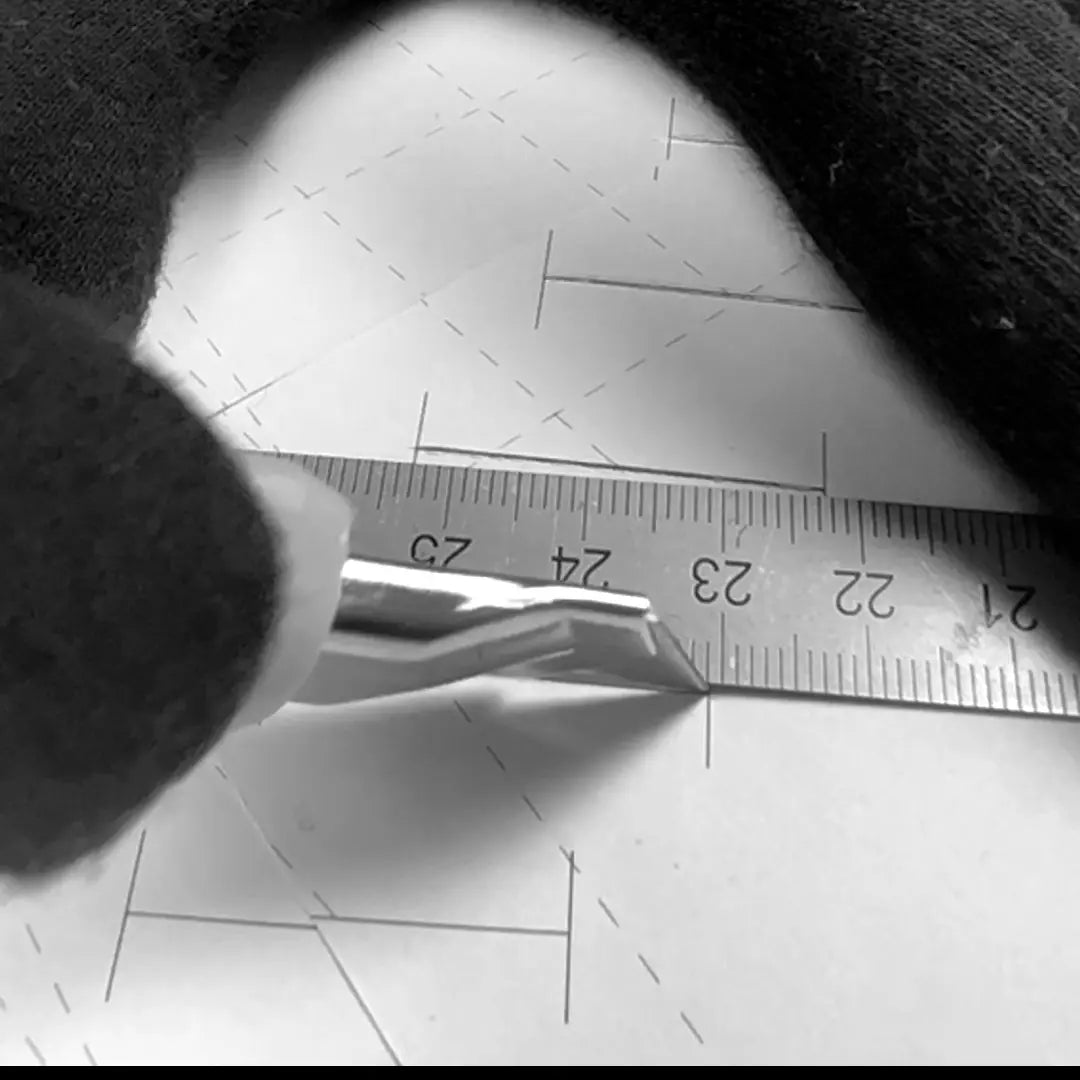
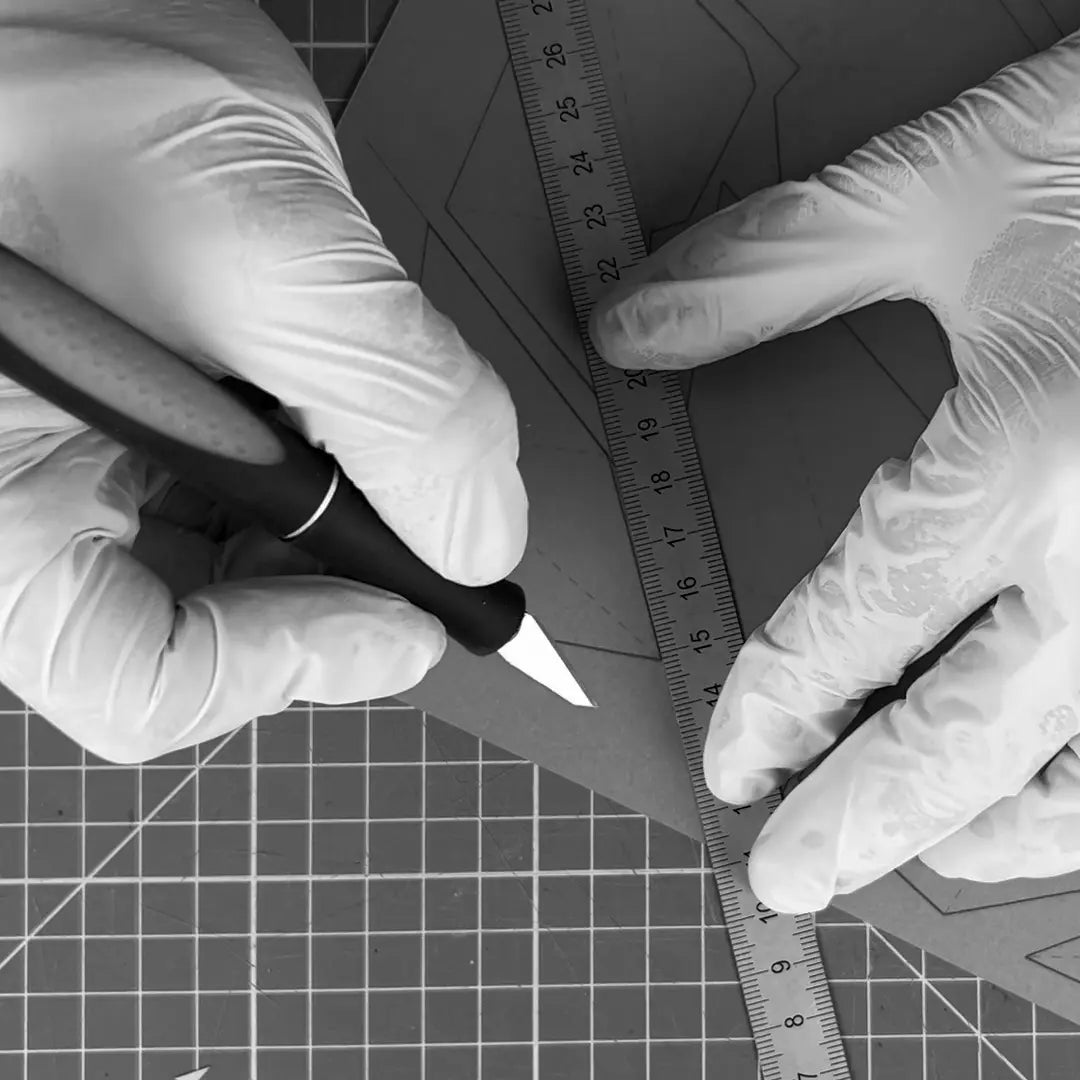
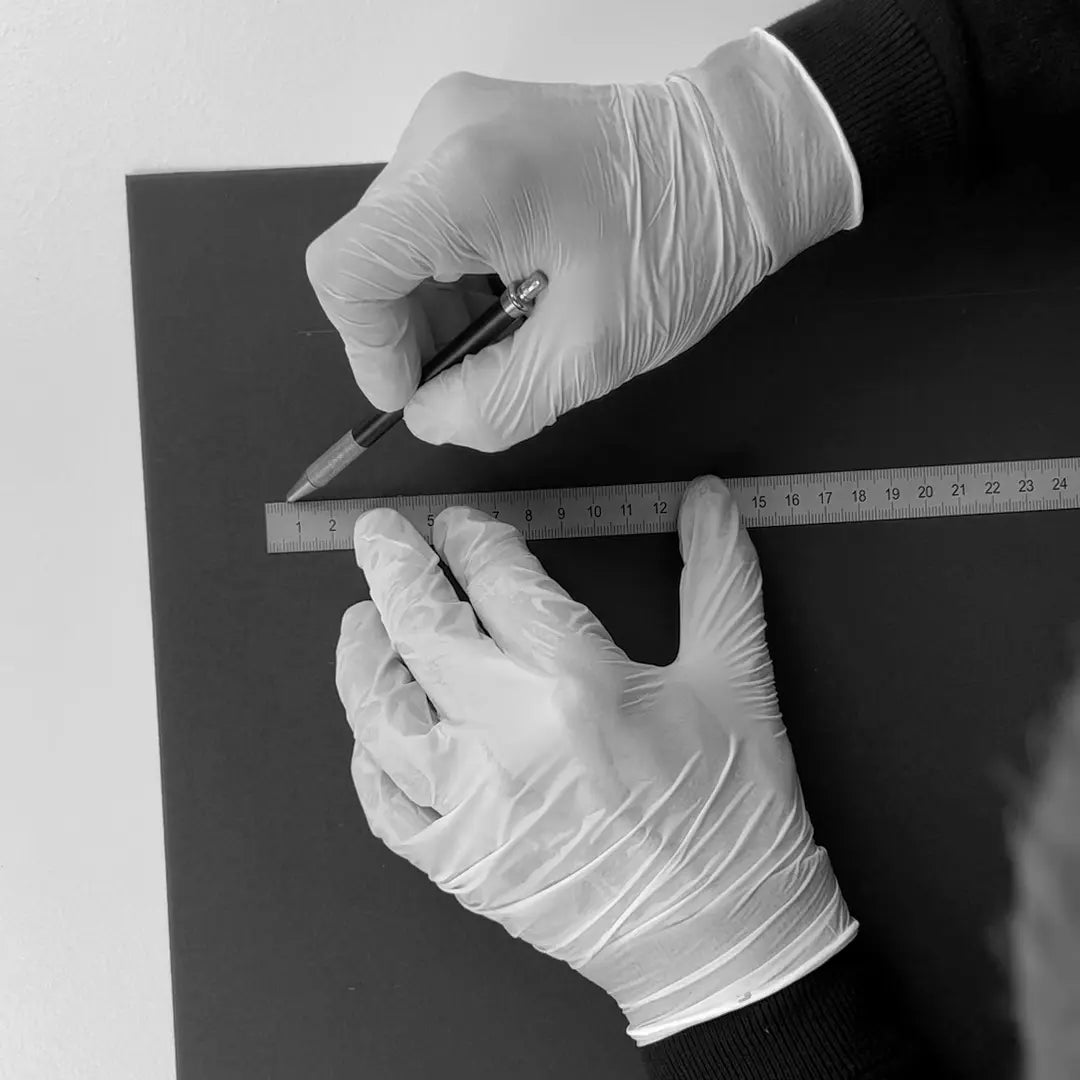
SCORE THE FOLDING LINES
Use a ruler and a dull knife (or a needle) to score the folding lines. Bare in mind NOT to cut the paper through. This will give rise to effortless, nice and sharp folds later. You can also use a dull pizza cutter to score the lines. This keeps them straight and easy to move through quickly or a scoring board.
-
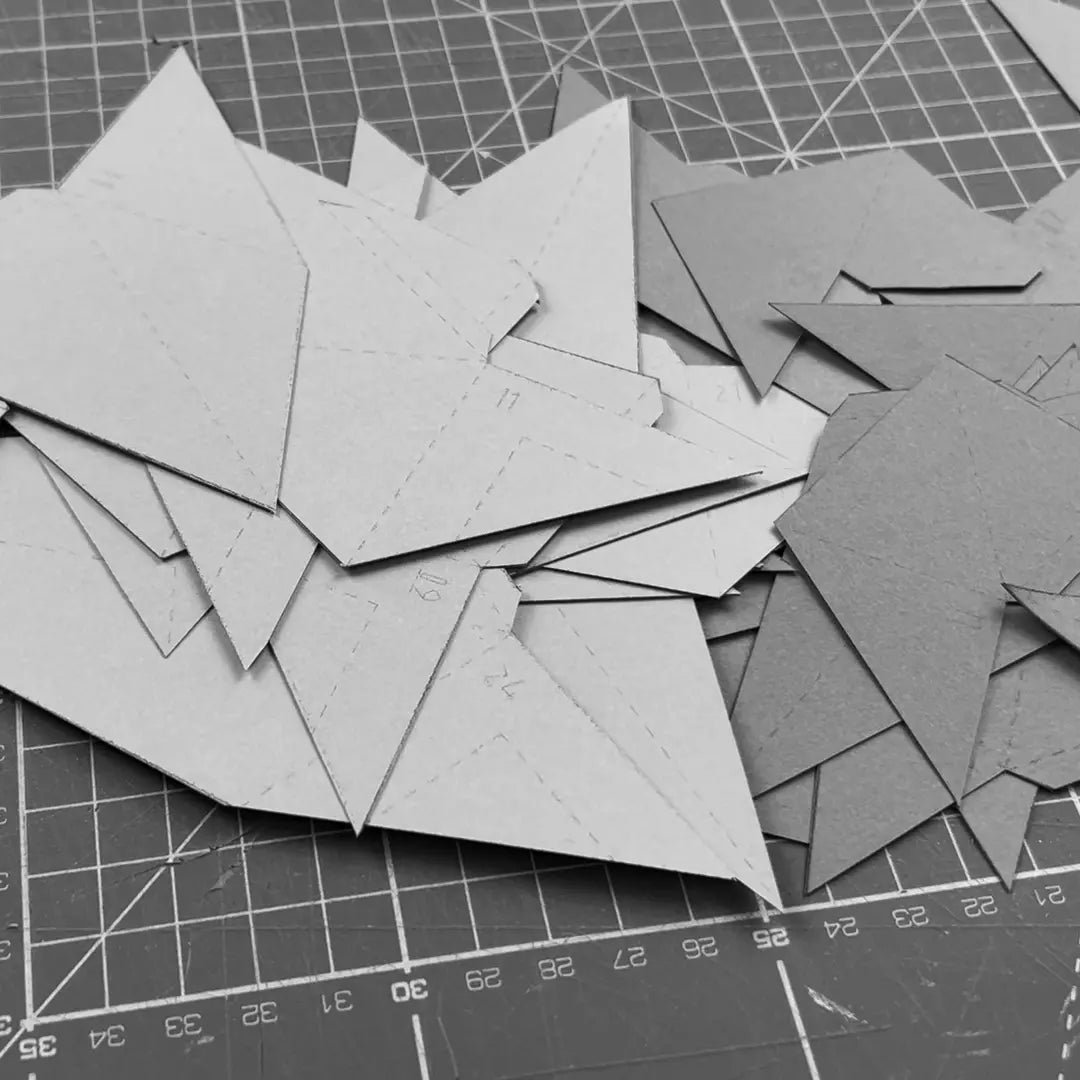
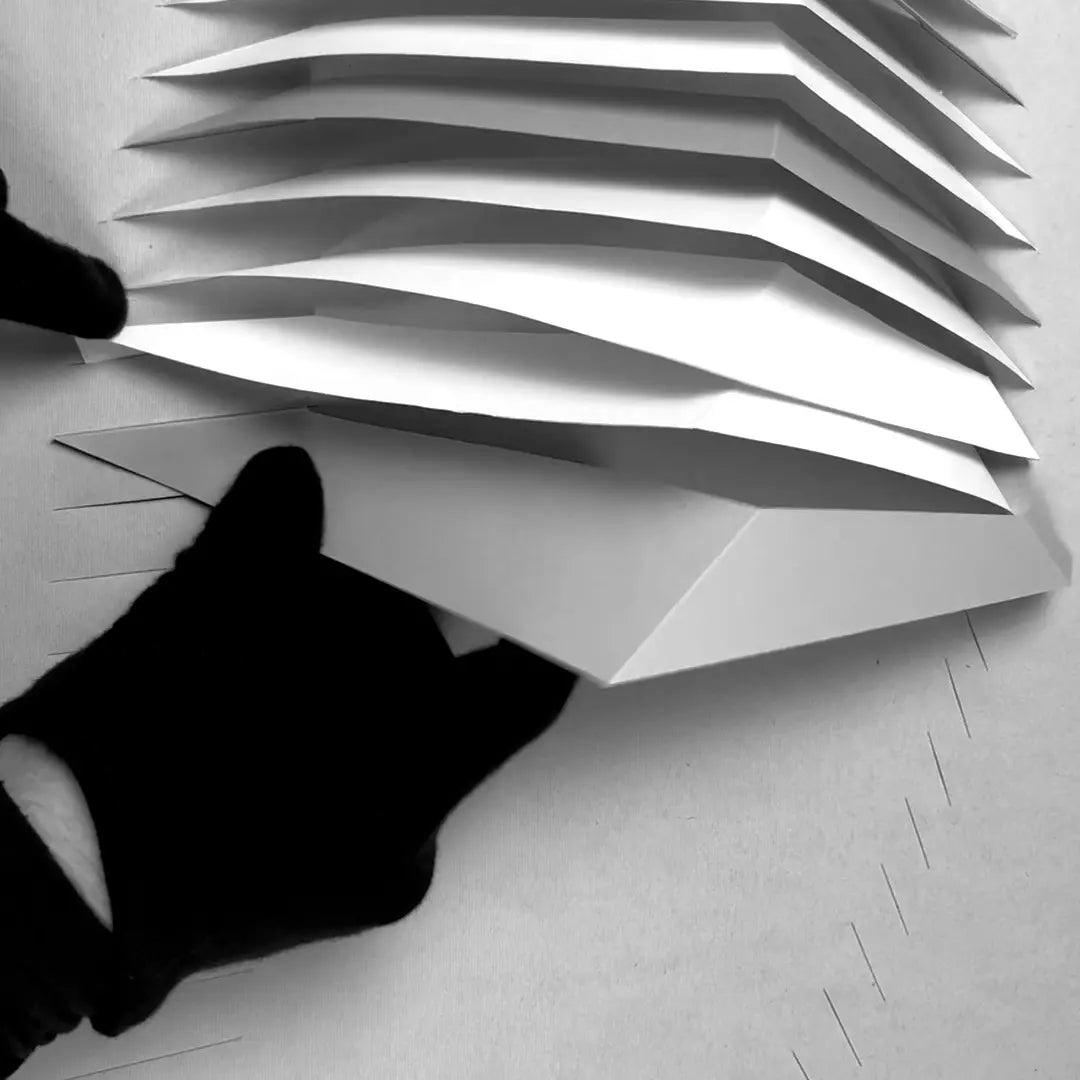
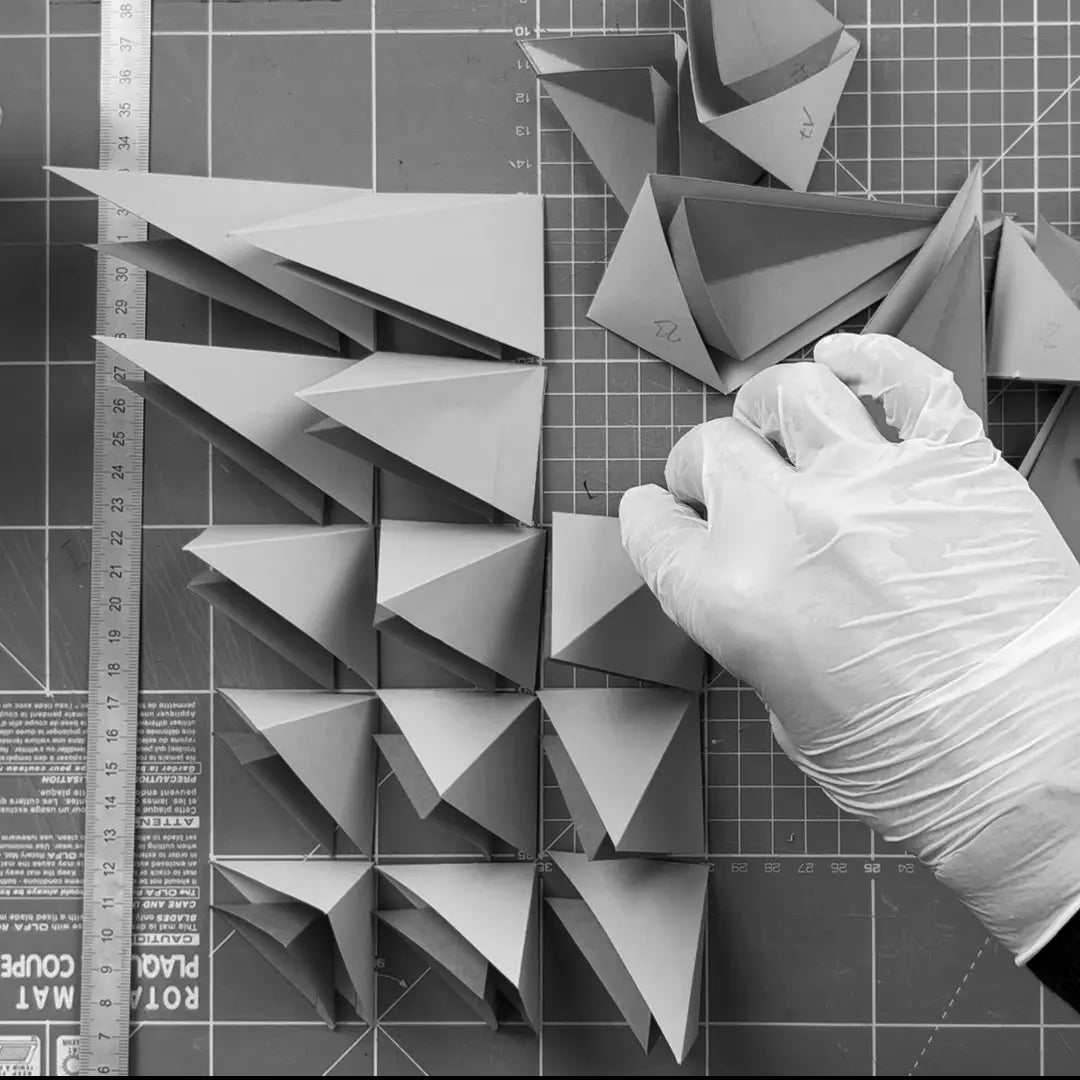
ORGANIZE THE SHAPES
Now is a good time to double-check if nothing is missing. Look before you leap! You can already organize them in ascending order.


STEP 03 / FOLDING-UP
-
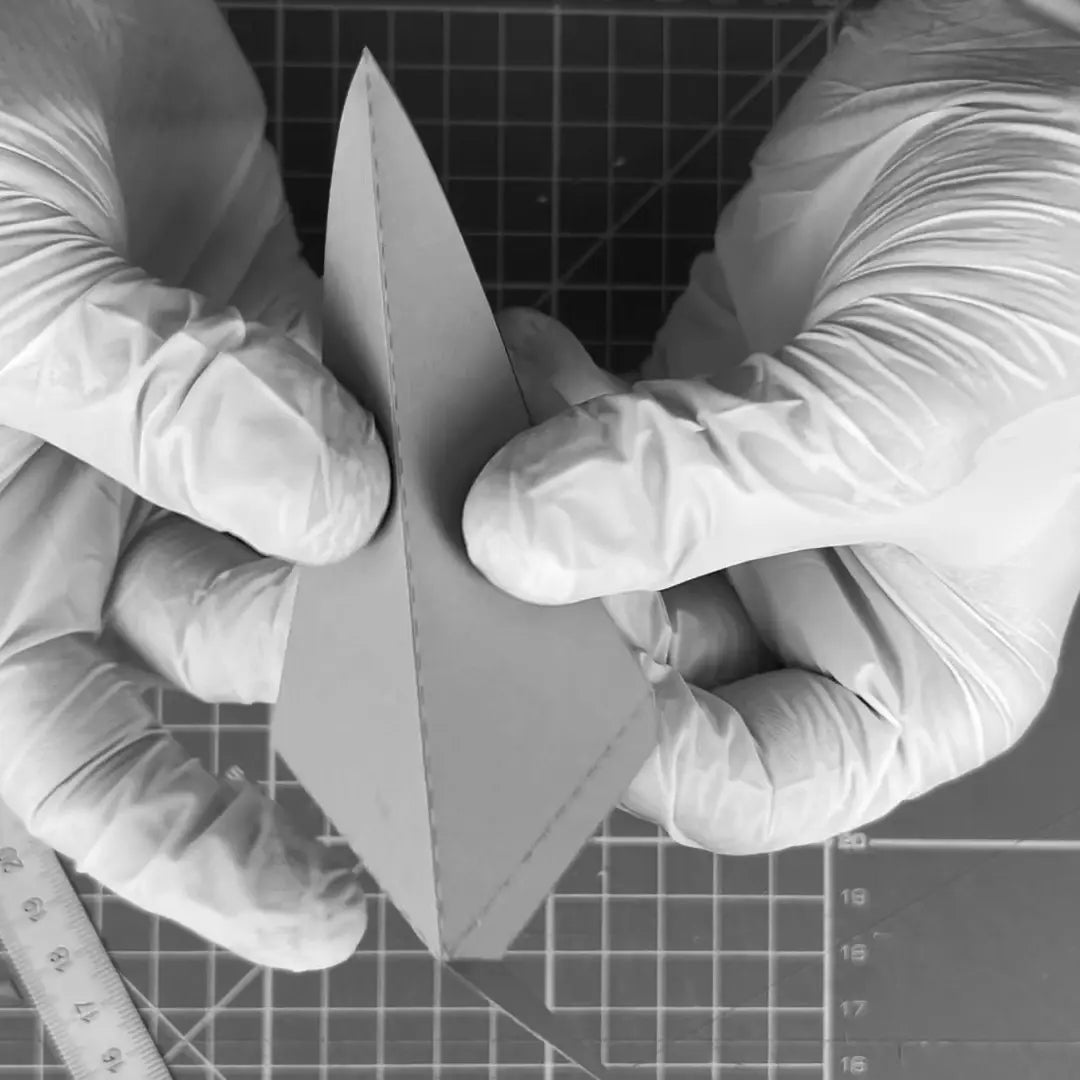
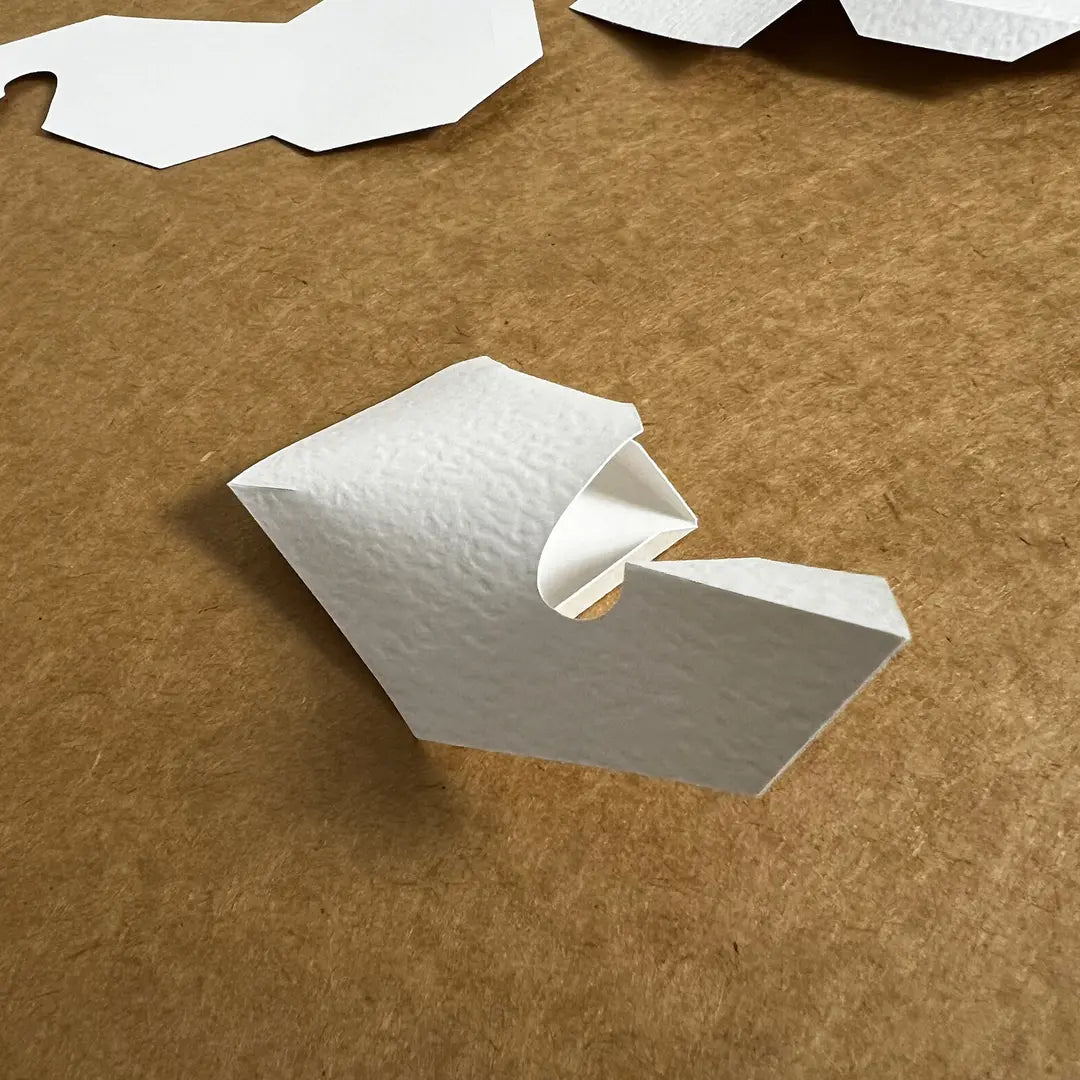
BENDING
Fold all the edges. Remember, the printed lines will end up inside the block.
-
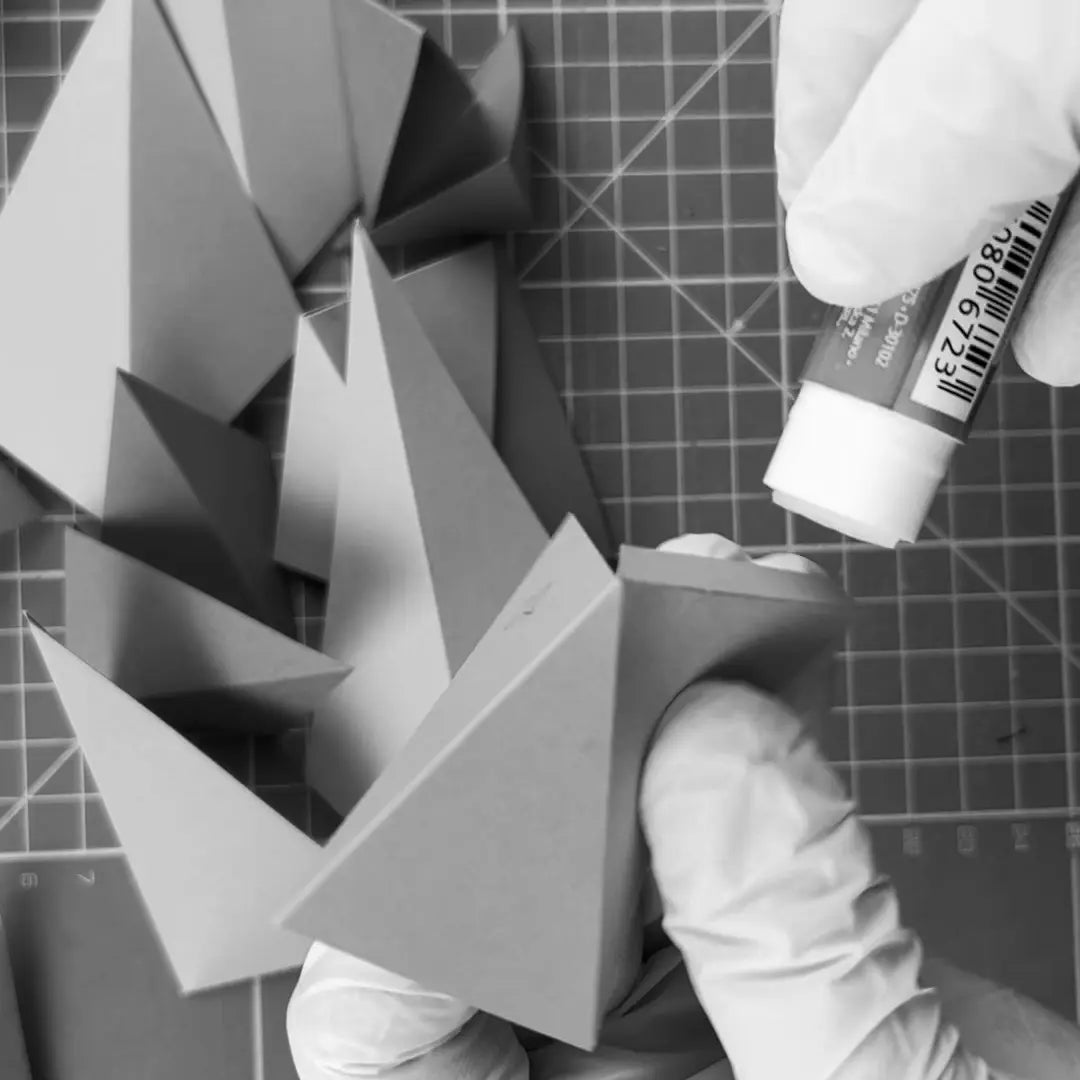
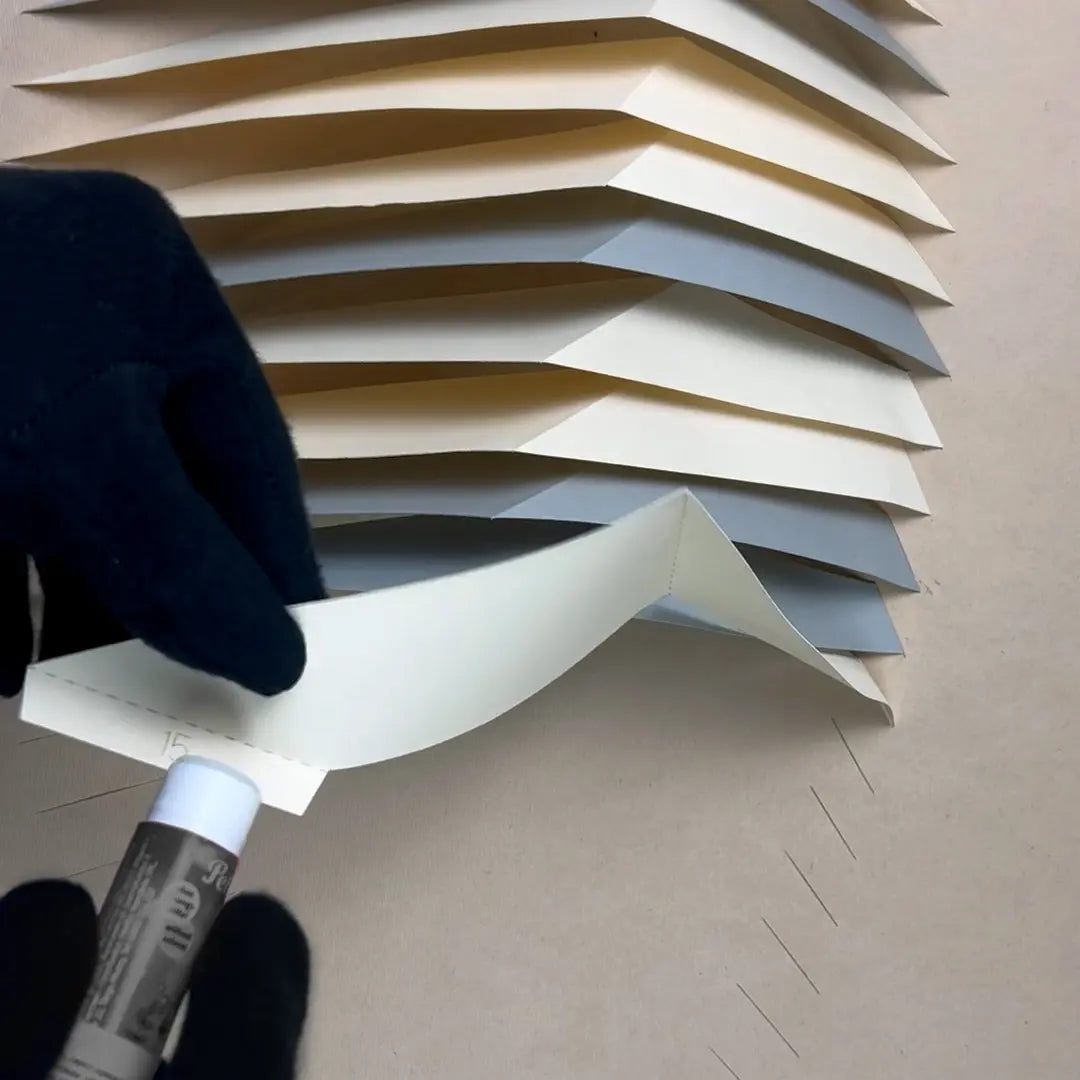
ADD GLUE TO THE TABS
Use regular paper glue.
-

FOLD UP THE SHAPE
Firmly press both sides and hold until they stick together.
-
KEEP THE LINES AND NUMBER INSIDE
Printed lines should stay inside the shape to keep the final artwork clean and polished. If you fold it the other way, the artwork will end up mirrored.
-
MARK THE BLOCK #NUMBER TO THE BOTTOM
Remember to mark each block number on the bottom so you will not get lost when assembling.
-
-
SHAPE EXCEPTIONS
Not all templates are folded the same way—some have exceptions. However, the blocks always have simple shapes and are easy to fold.
-
-


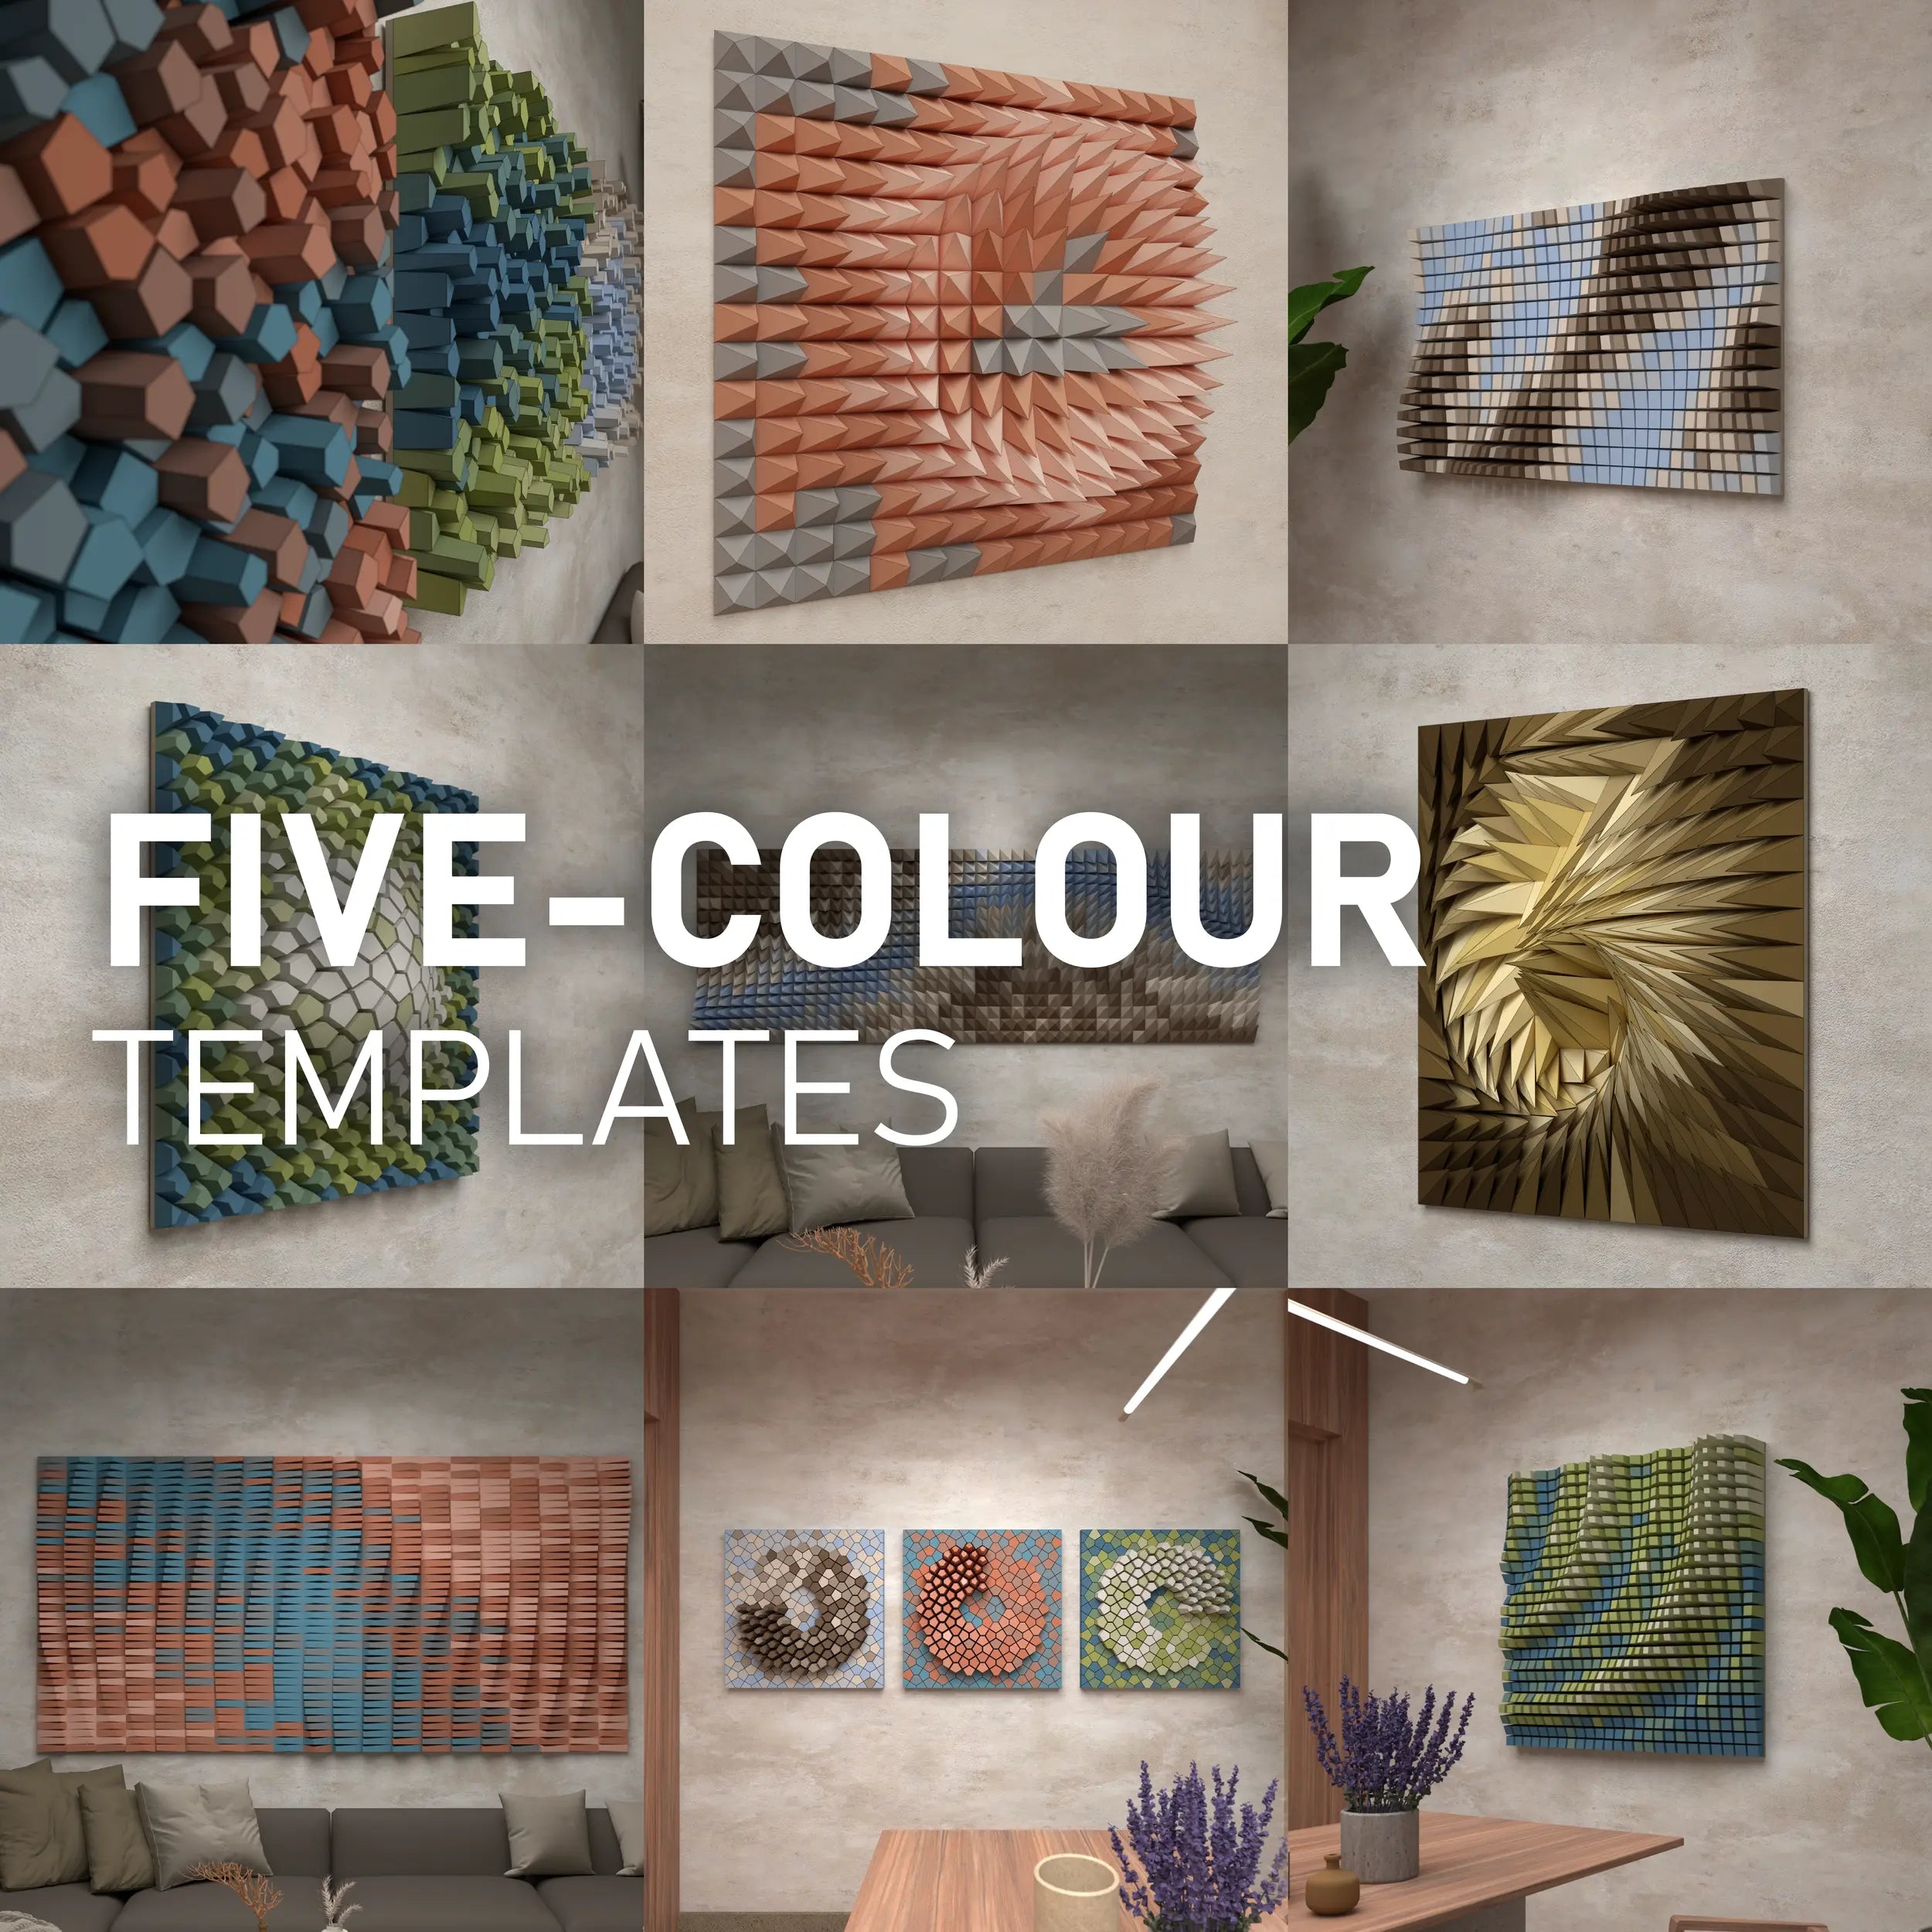
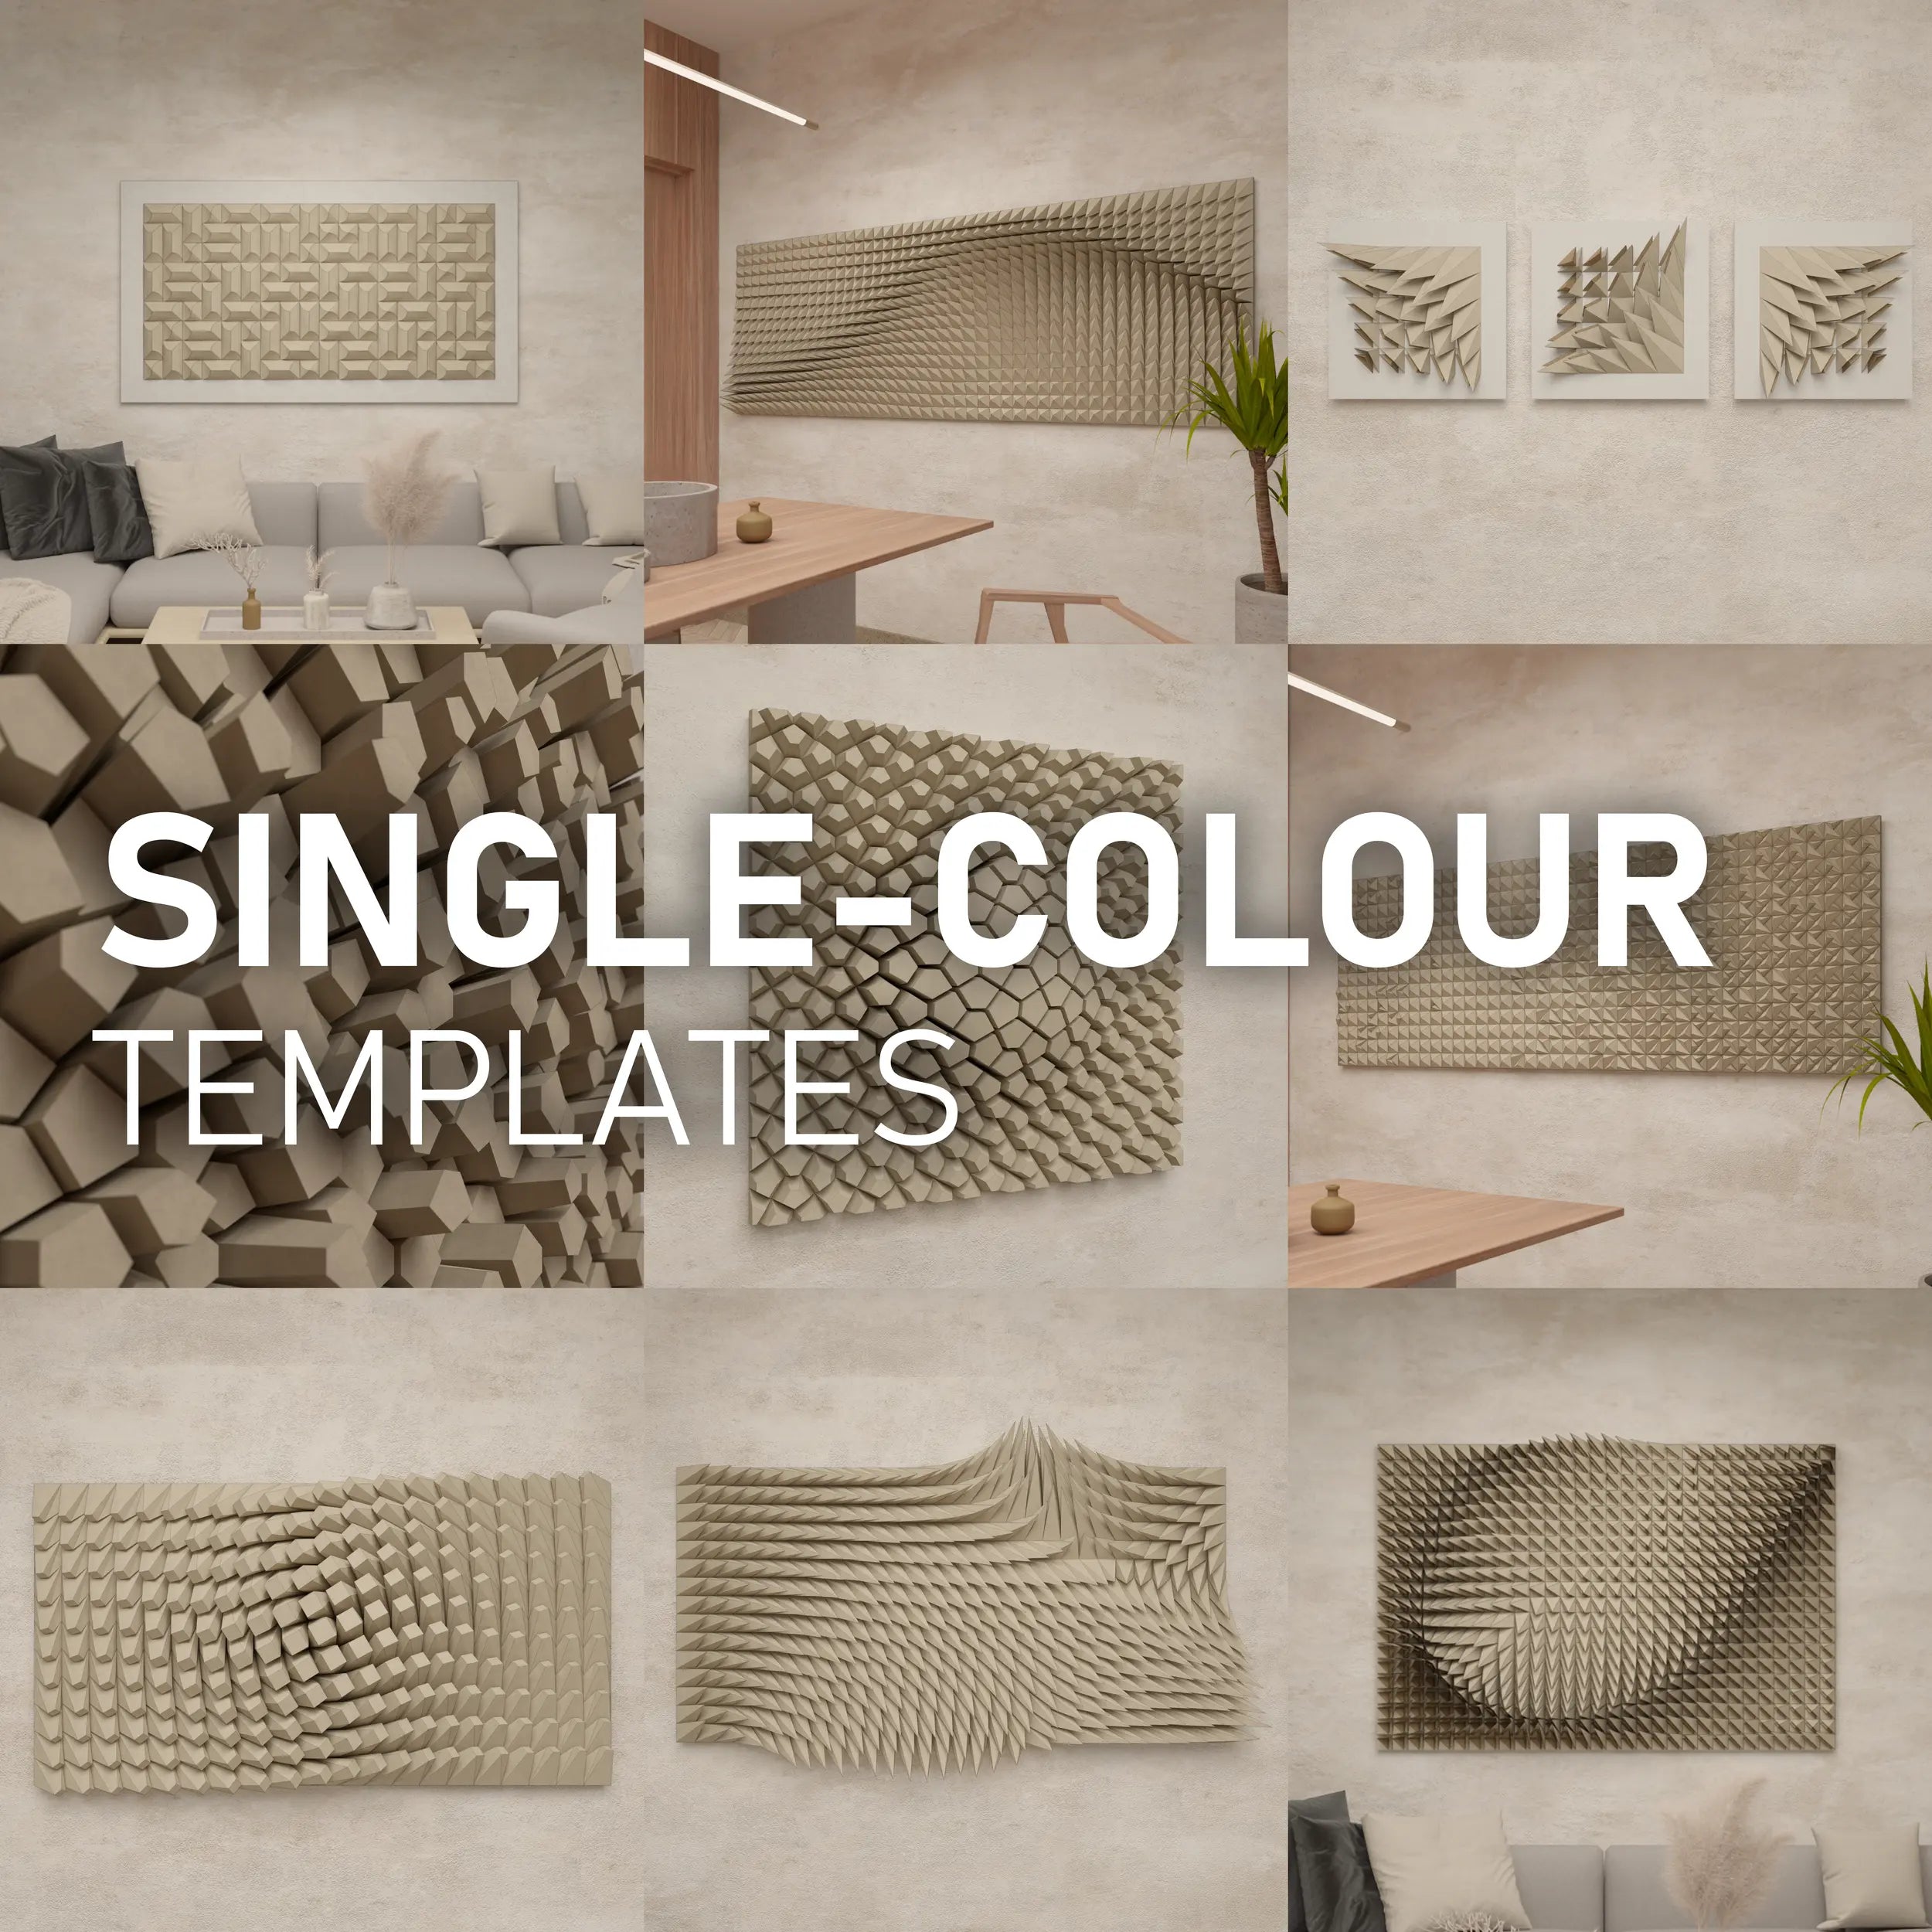
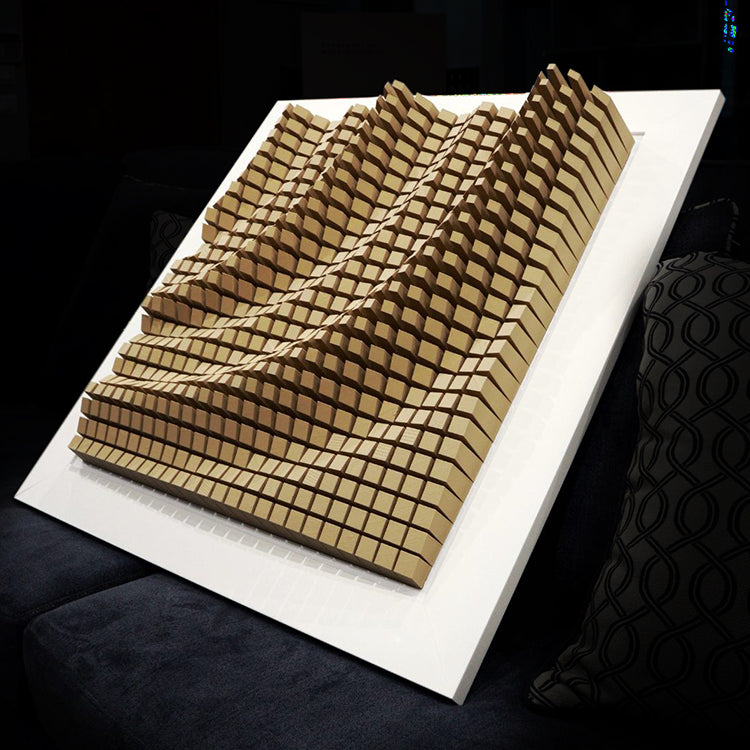
STEP 04 / PREASSEMBLY (OPTIONAL - NOT FOR ALL PARAGAMI DESIGNS)
-
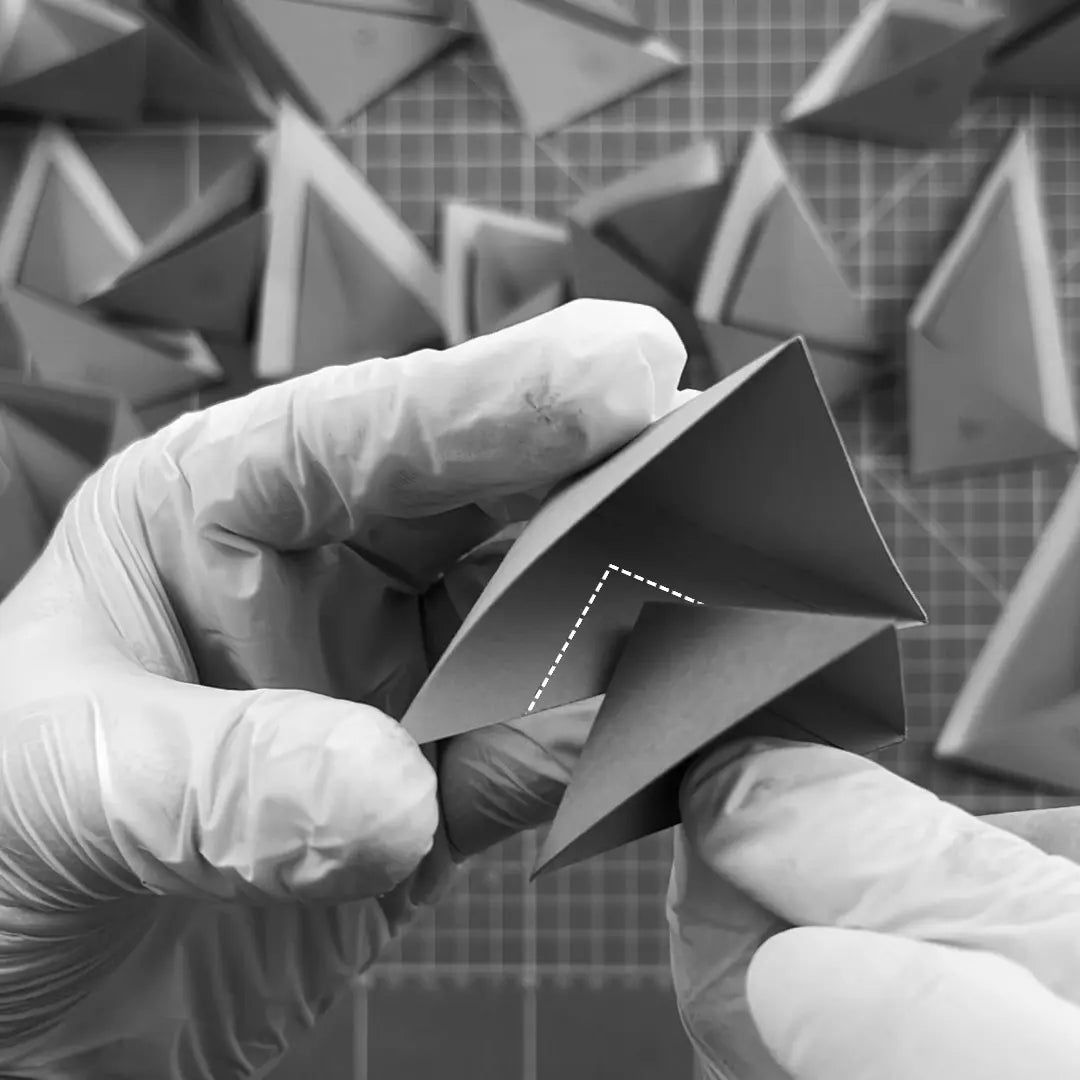
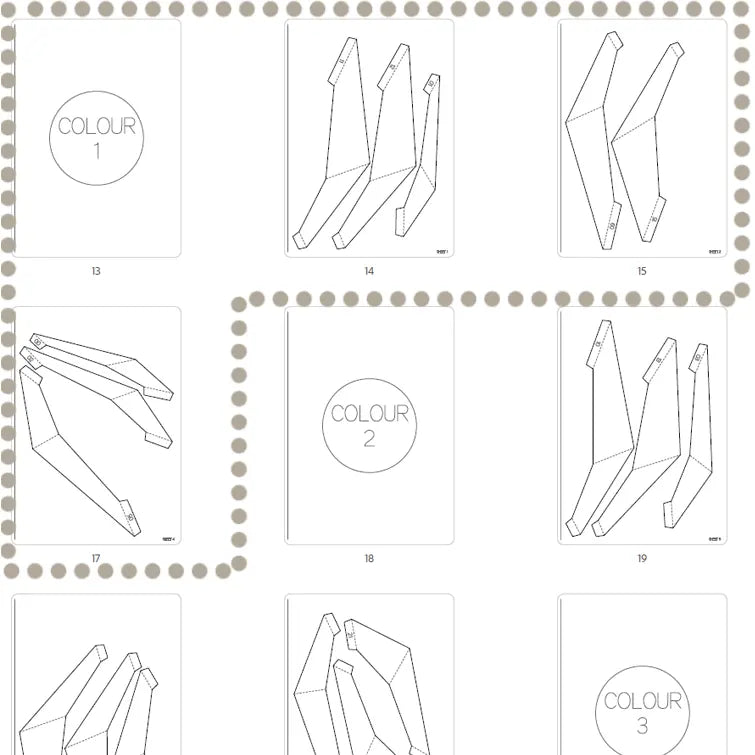
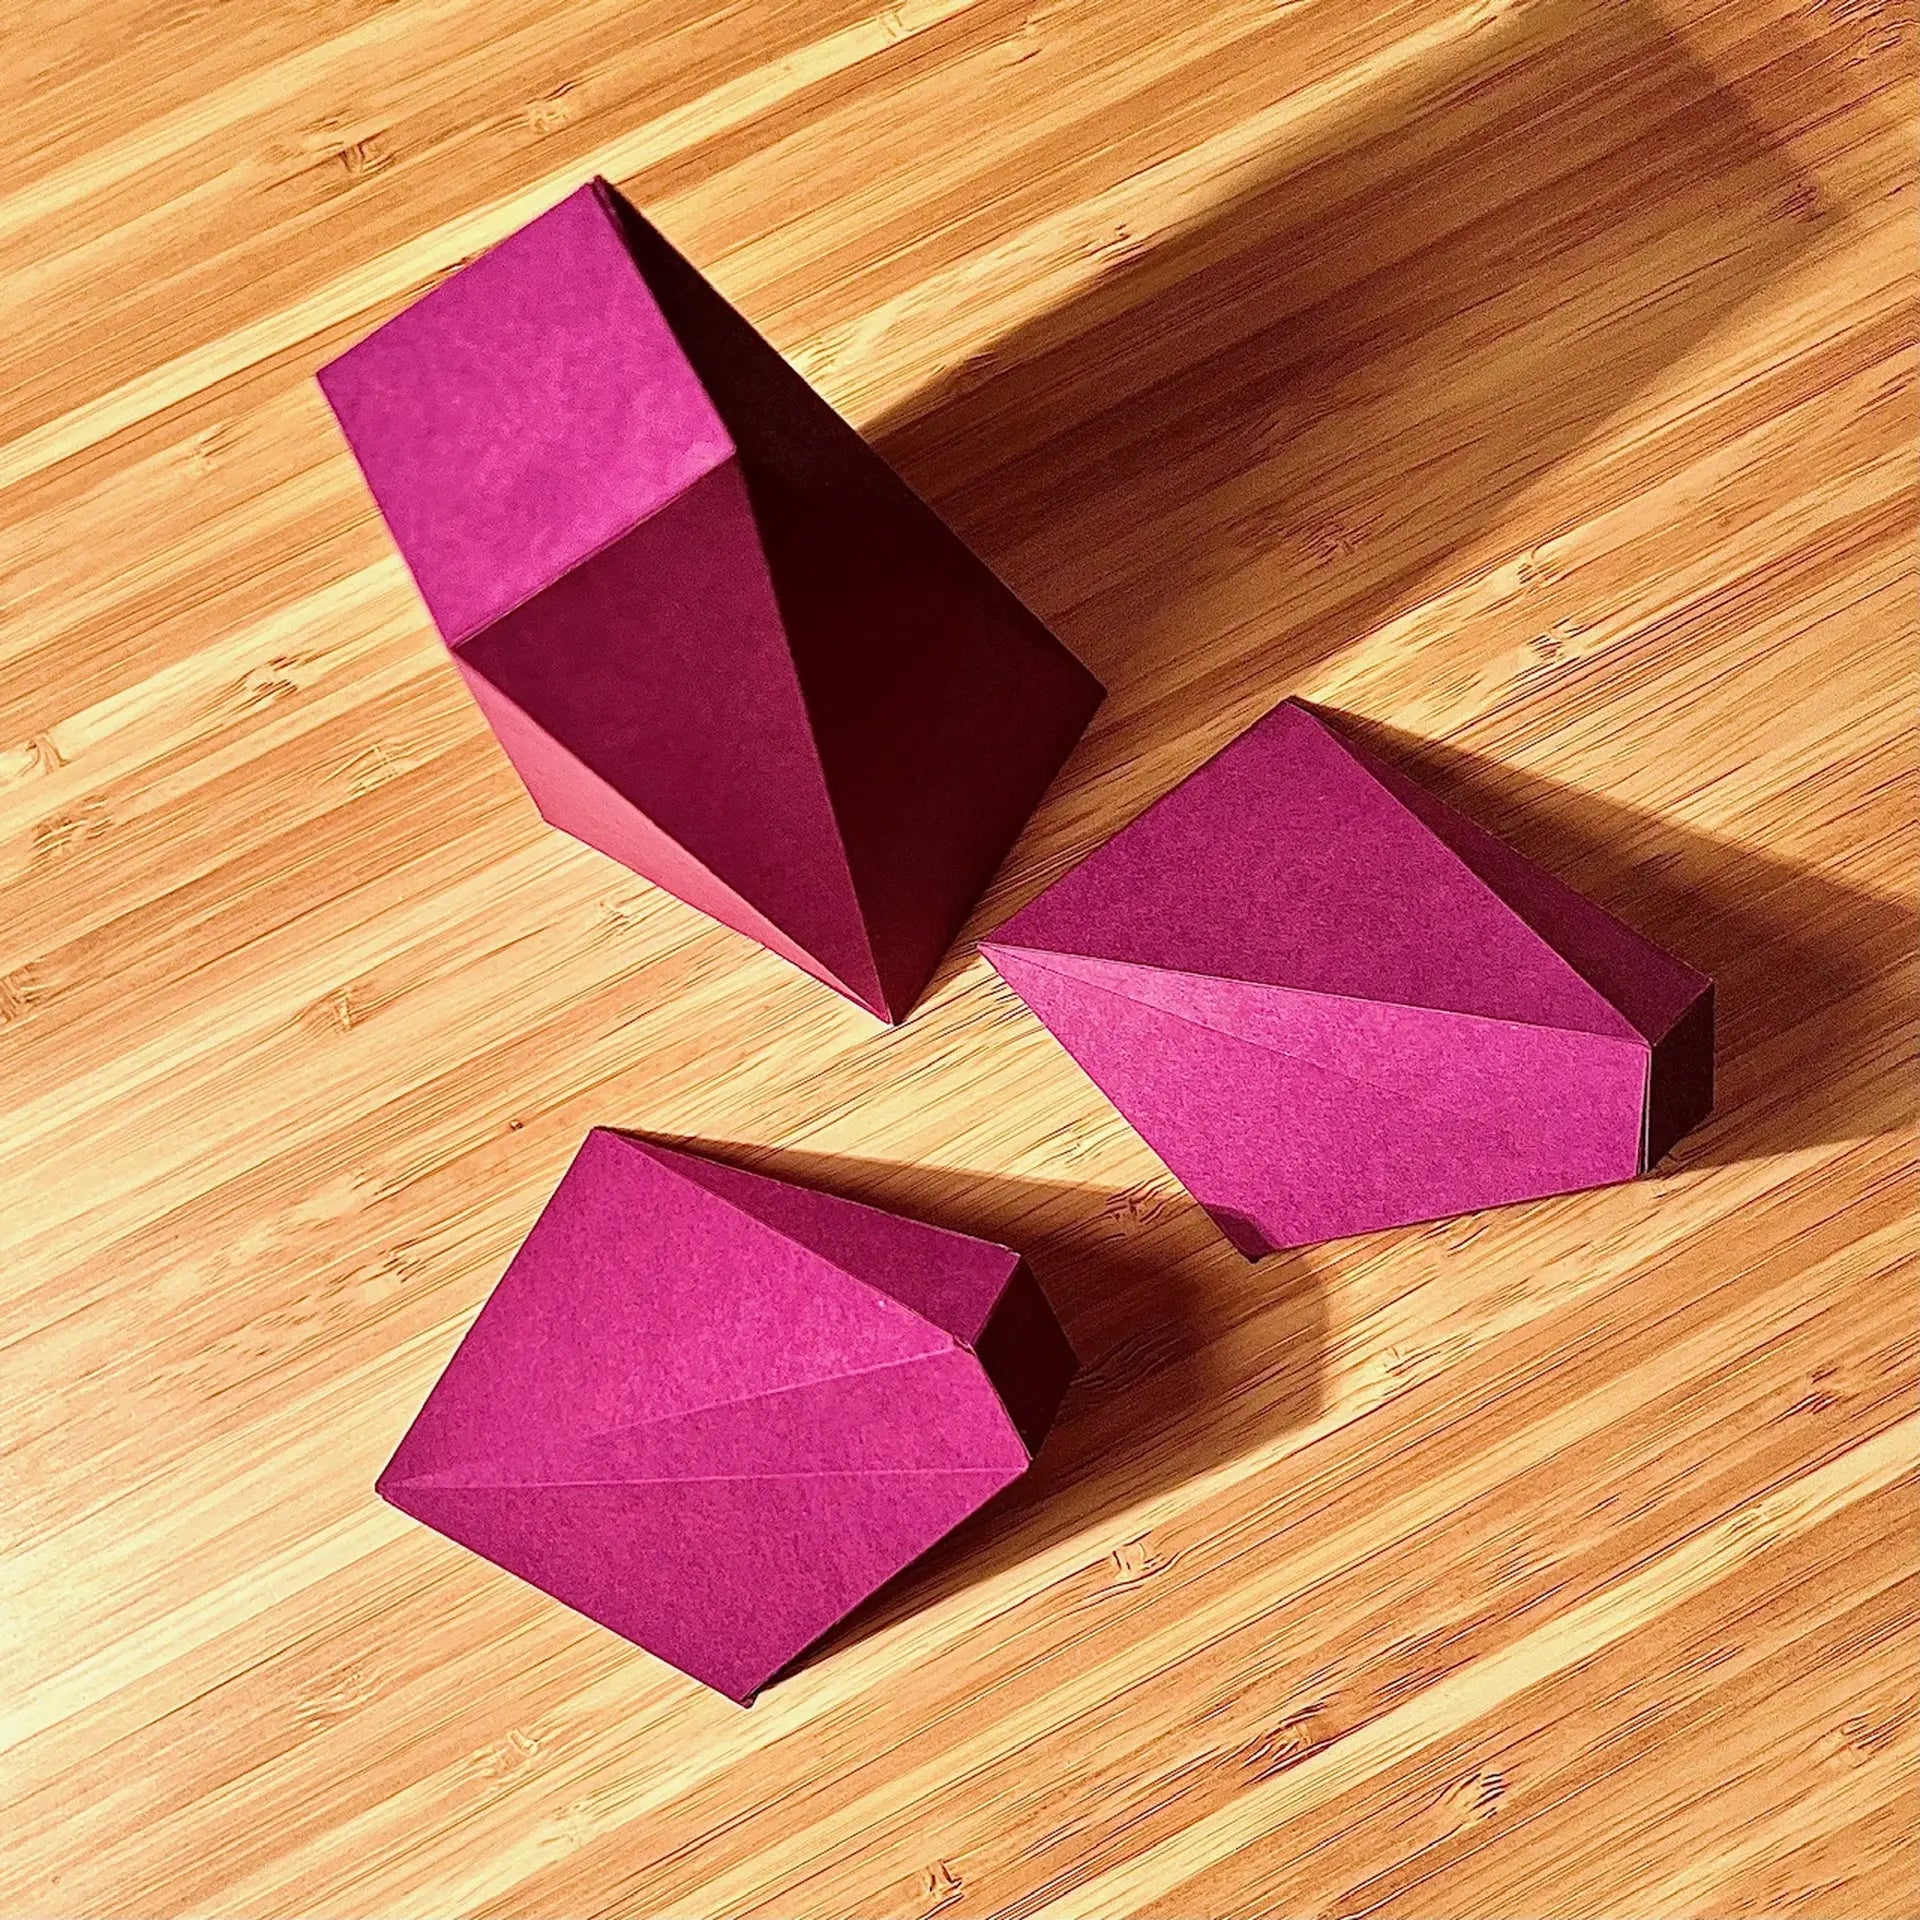
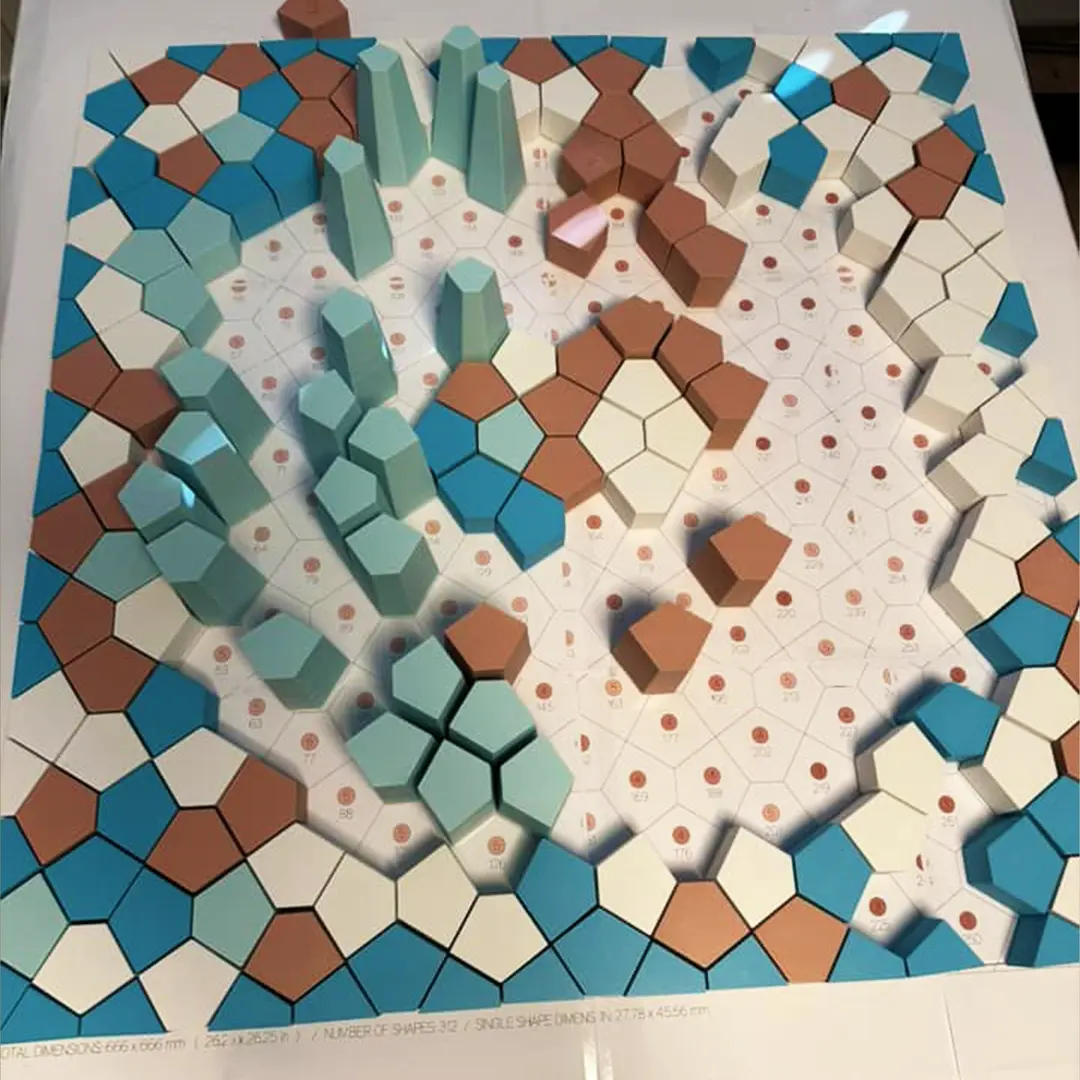
TWO SHAPES - BIG & SMALL
Some of the Paragame designs consists of multiple shapes - small and big pyramids. It is good to make each from different colour paper.
-

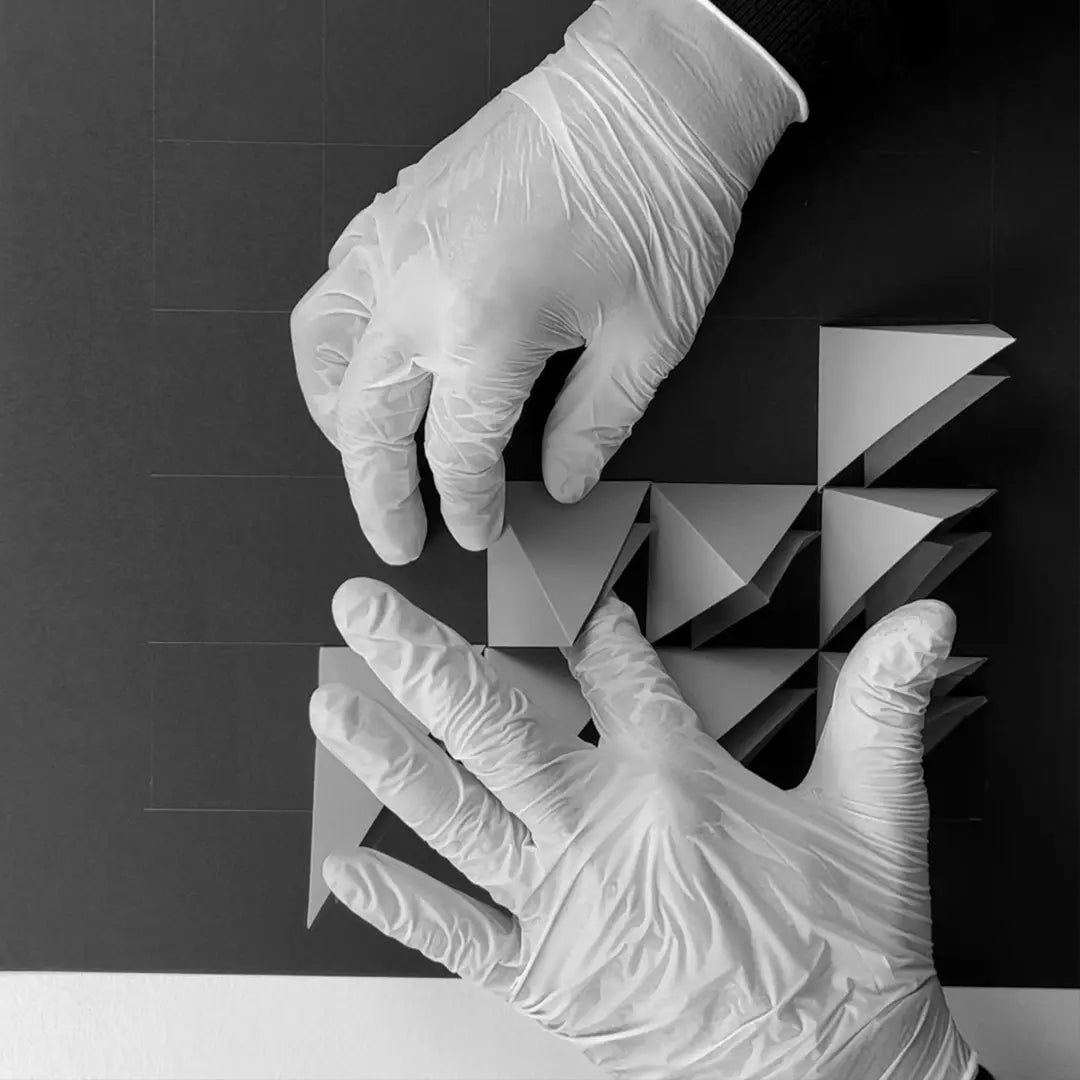
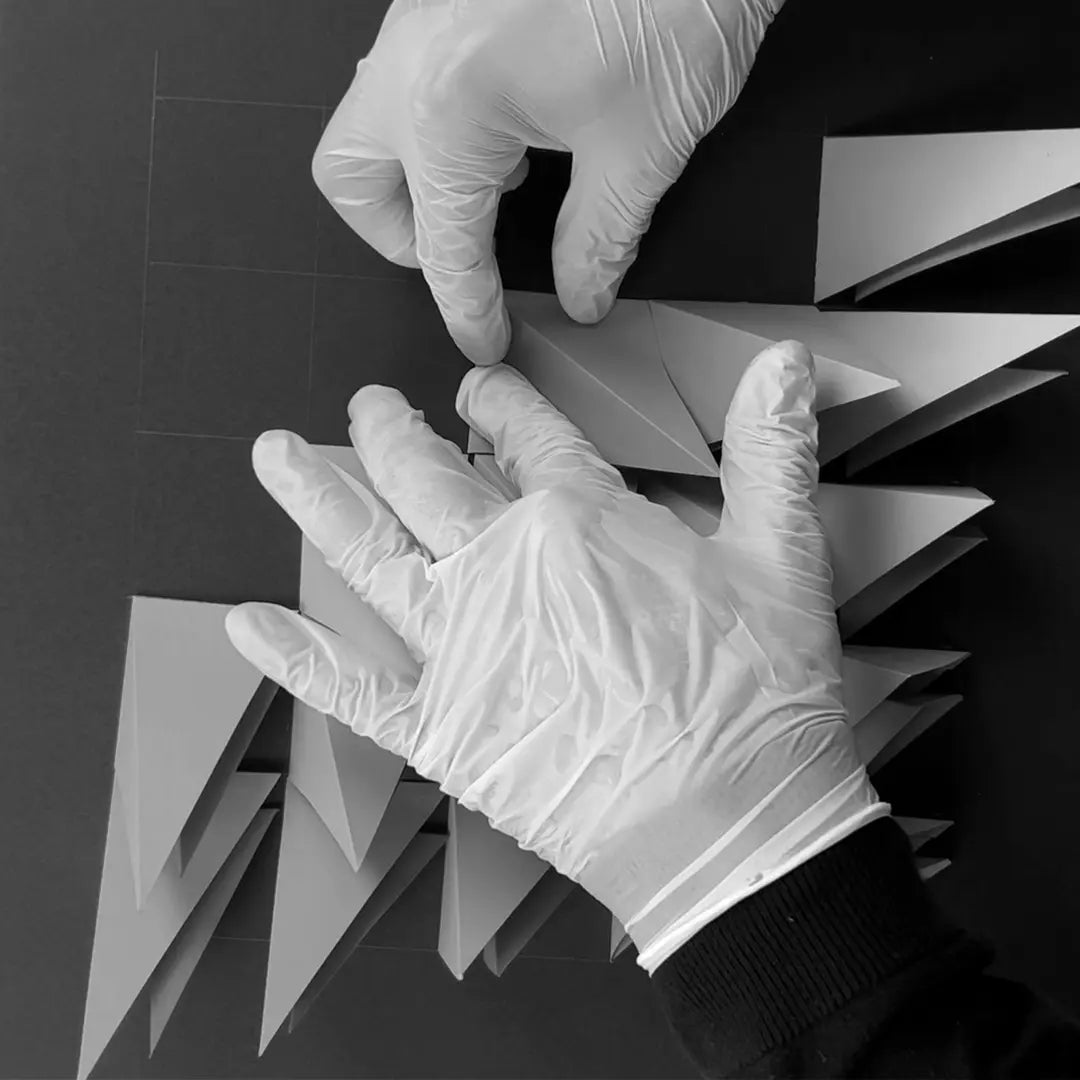
GLUEING TOGETHER
Glue the small one into the big one. There is guiding dashed line for proper alignment.
-
GLUE - HOLD - REPEAT
Repeat the process with all the shapes. Remember - do not glue wrong number together!


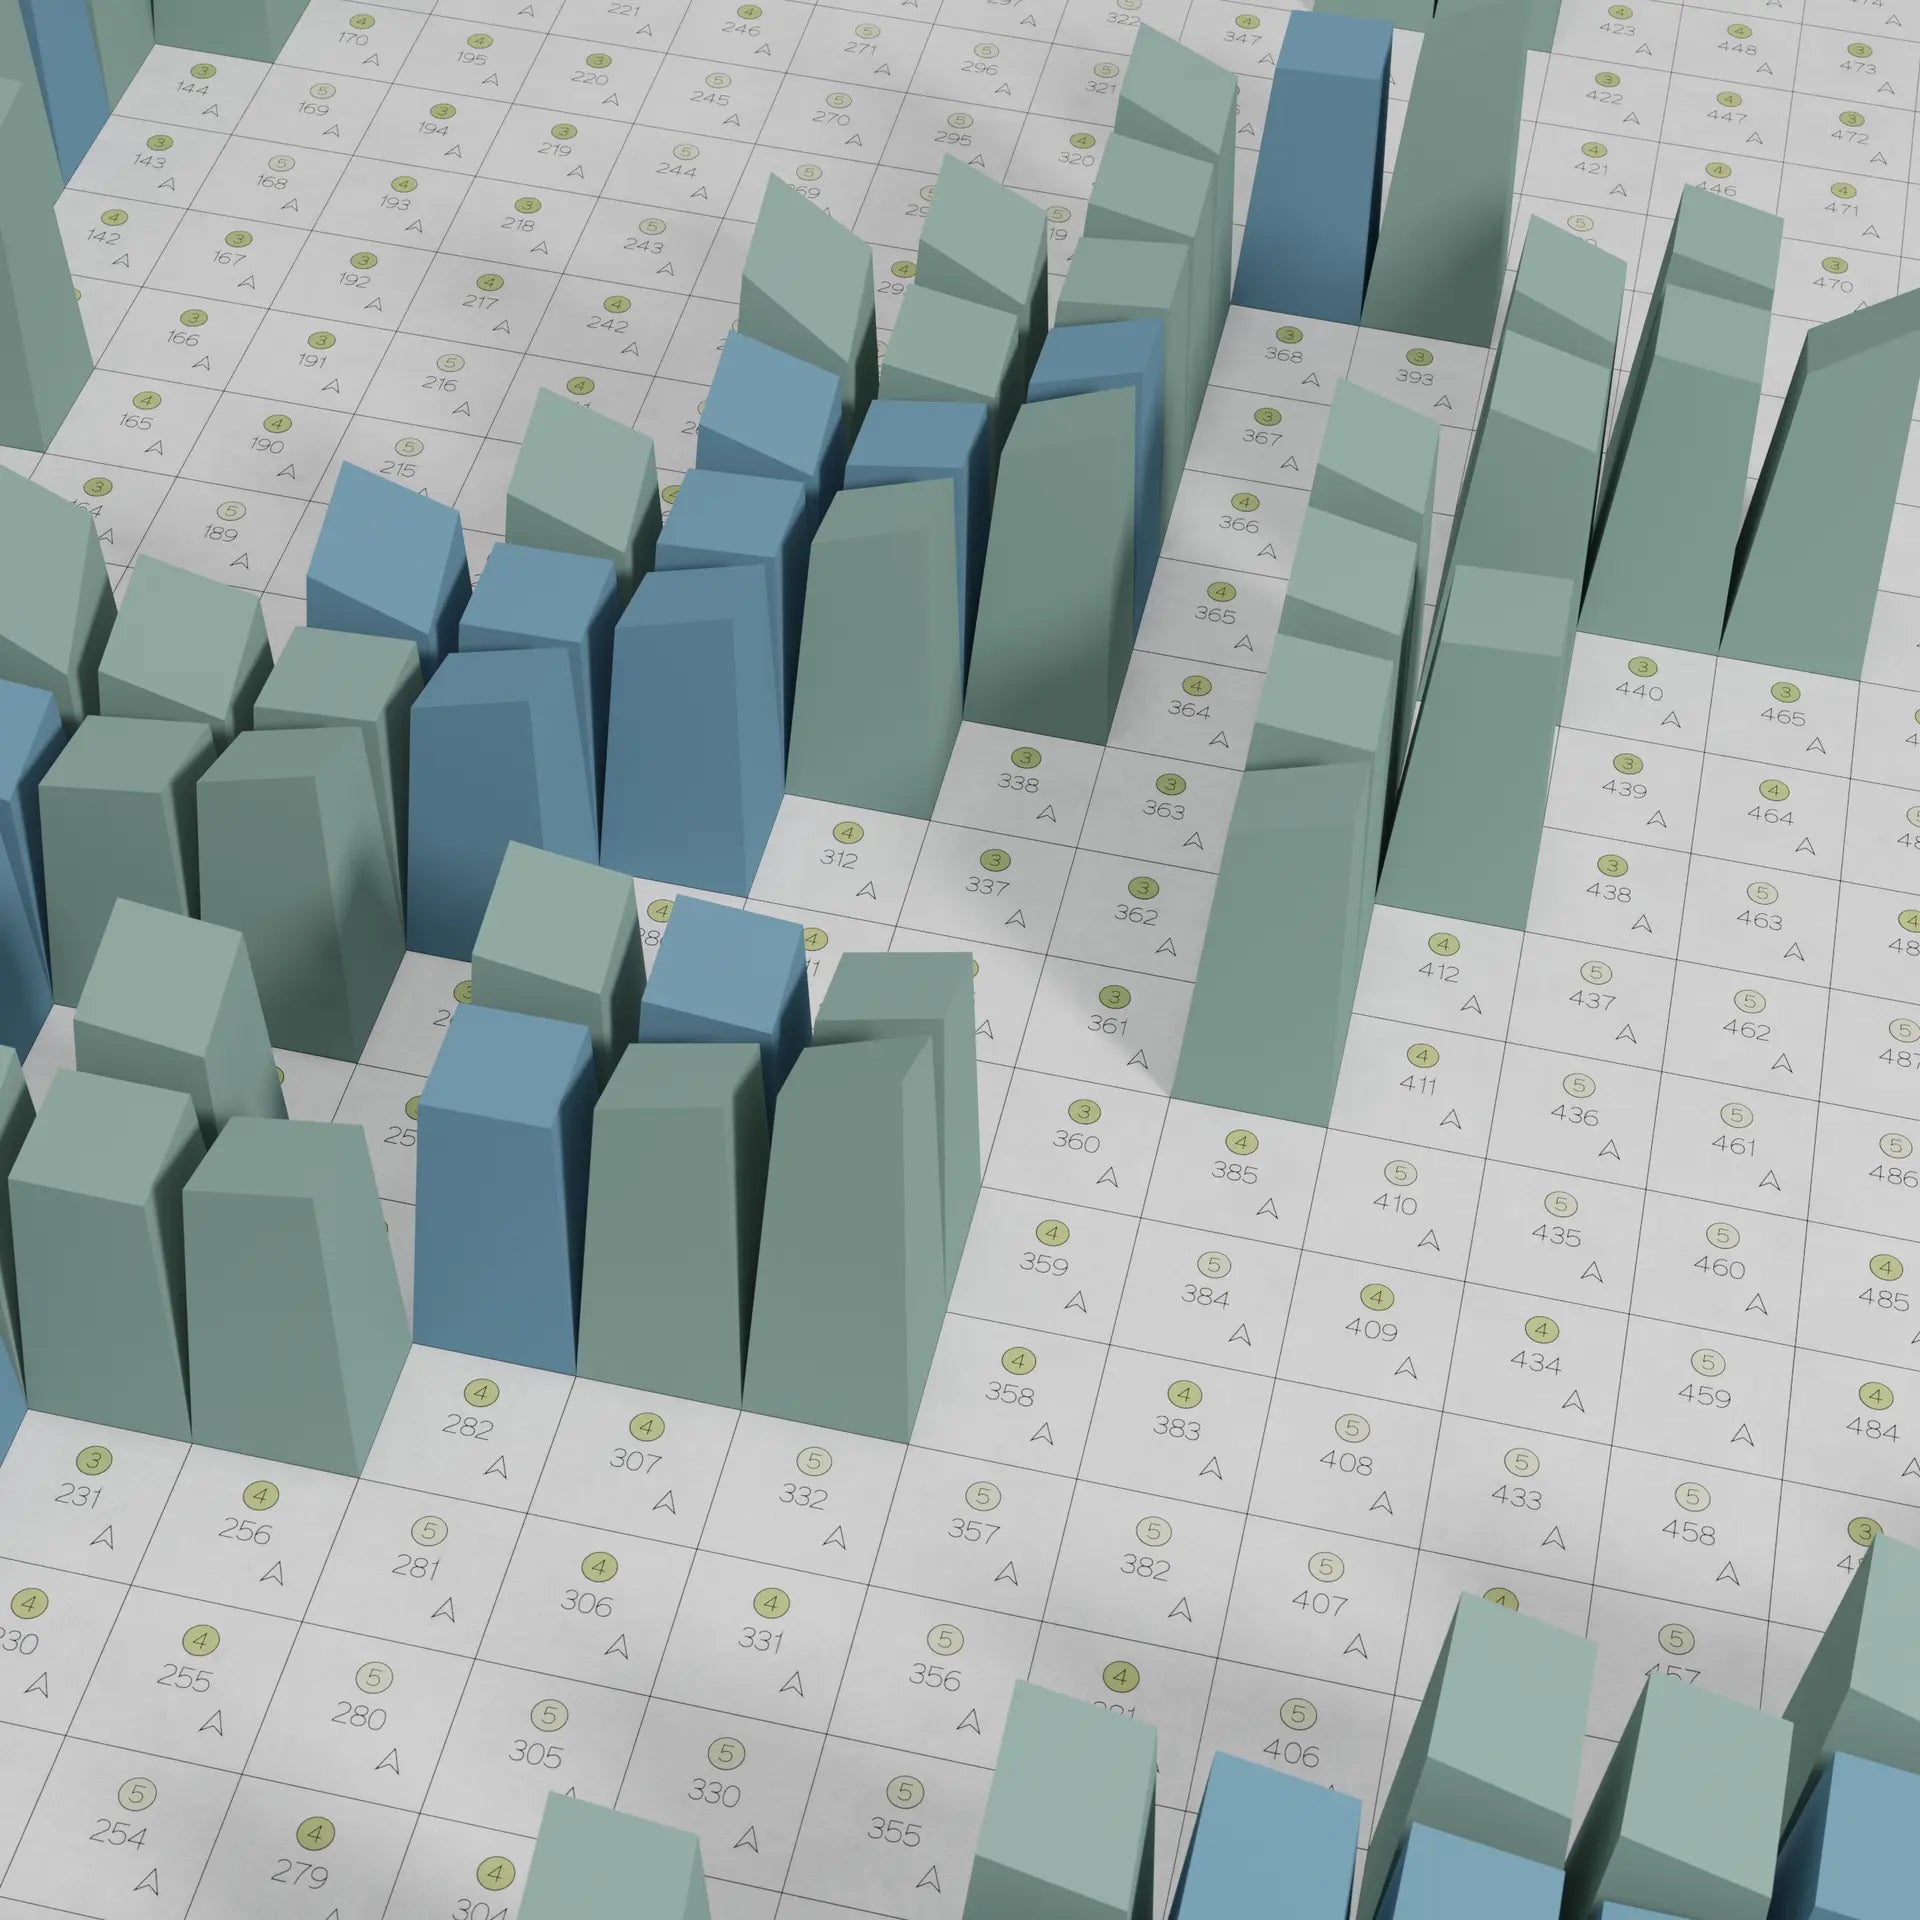
STEP 05 / THE GRID
-
PREPARE THE BACKGROUND
Get ideas on what material to use and how to prepare your backboard to secure your 3D Paragami wall art in this ARTICLE ➜
-
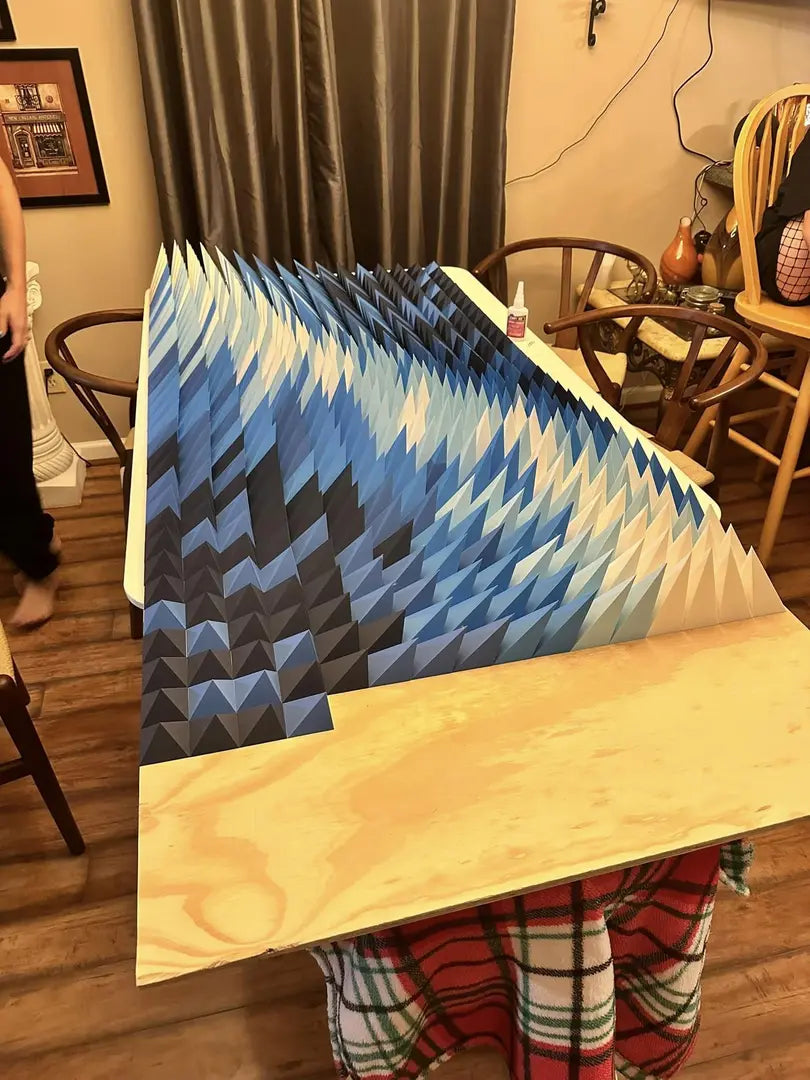
ASSEMBLE IT IN DRAFT
First, assemble the blocks in the draft without glueing. Again - look before you leap!
-
GLUE IN ON THE BACKGROUND
Finally, it is time to start sticking the shapes to the background. Start with the ones, which are not hanging over other blocks.
-
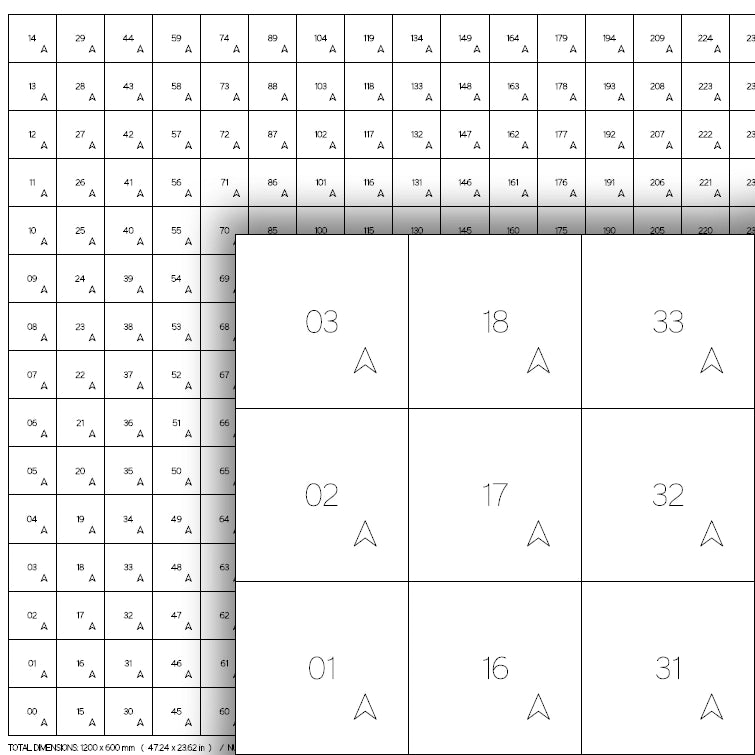
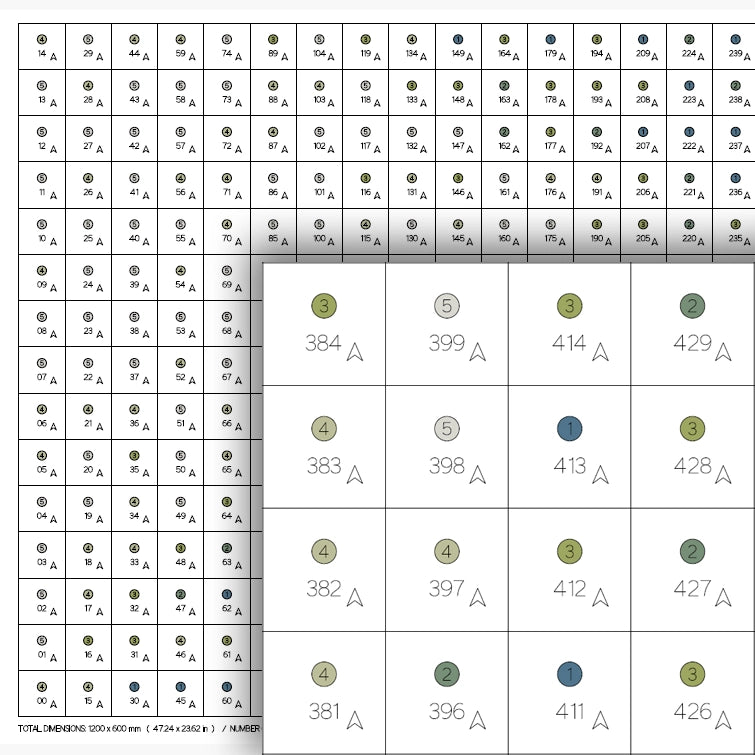
LAYOUT IN FULL SCALE
LEAR HOW TO PRINT THE LAYOUT IN FULL SCALEEvery template includes a layout PDF, featuring a numbered grid that shows where each block belongs.
If needed, you can print the layout at full scale using your home printer—just select "Poster" mode.
-
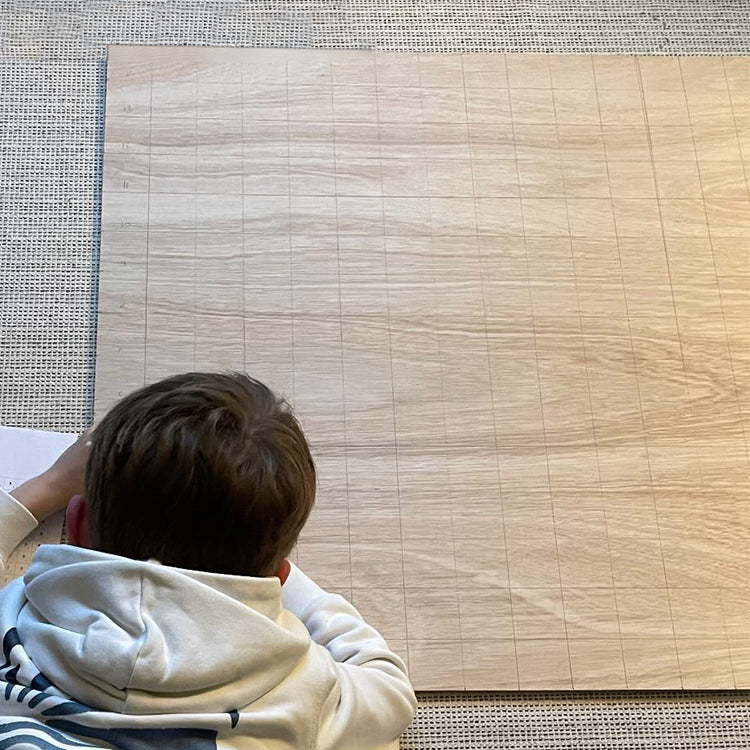
DRAW THE GRID DIRECTLY ON THE BACKBOARD
We recommend redrawing the grid directly on the background—there’s no need to print the layout. Since the blocks usually have simple shapes, drawing the grid is easy.
Using a grid helps minimize inaccuracies. Even a 0.1mm gap can lead to a significant shift when applied across 500+ blocks.
-

-
-
-


STEP 06 / FINALIZING FOLDING AND ASSEBLY


STEP 07 / FINAL TOUCH
-
EDGES
Cutting the board bigger that is the size of the art and leaving plain edges will make it look more artistic and clean.
-
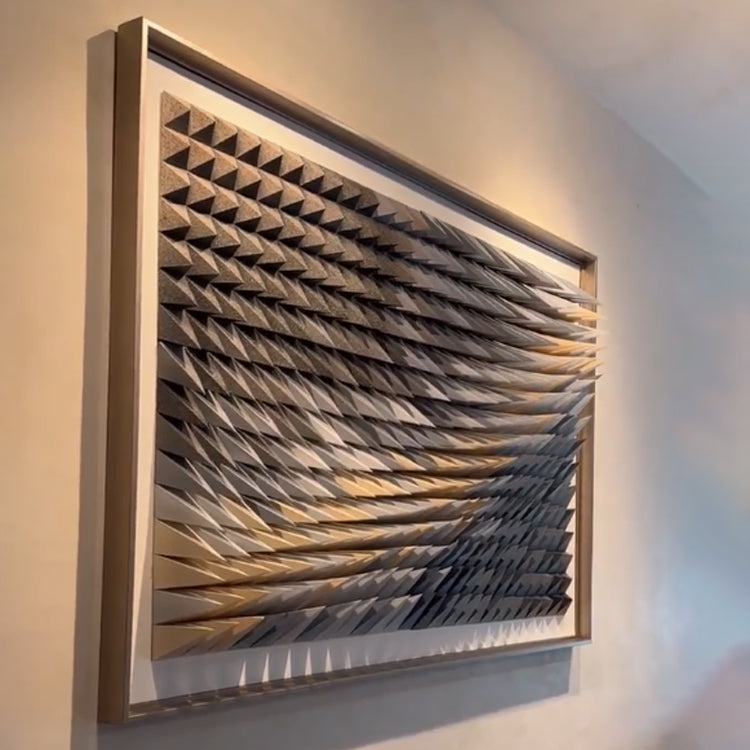
FRAME
Framing is the unsung hero of wall art - the final touch that takes the
piece to the next level. A well-chosen frame doesn’t just complement the
art; it elevates it, adding depth and sophistication to the
presentation. -
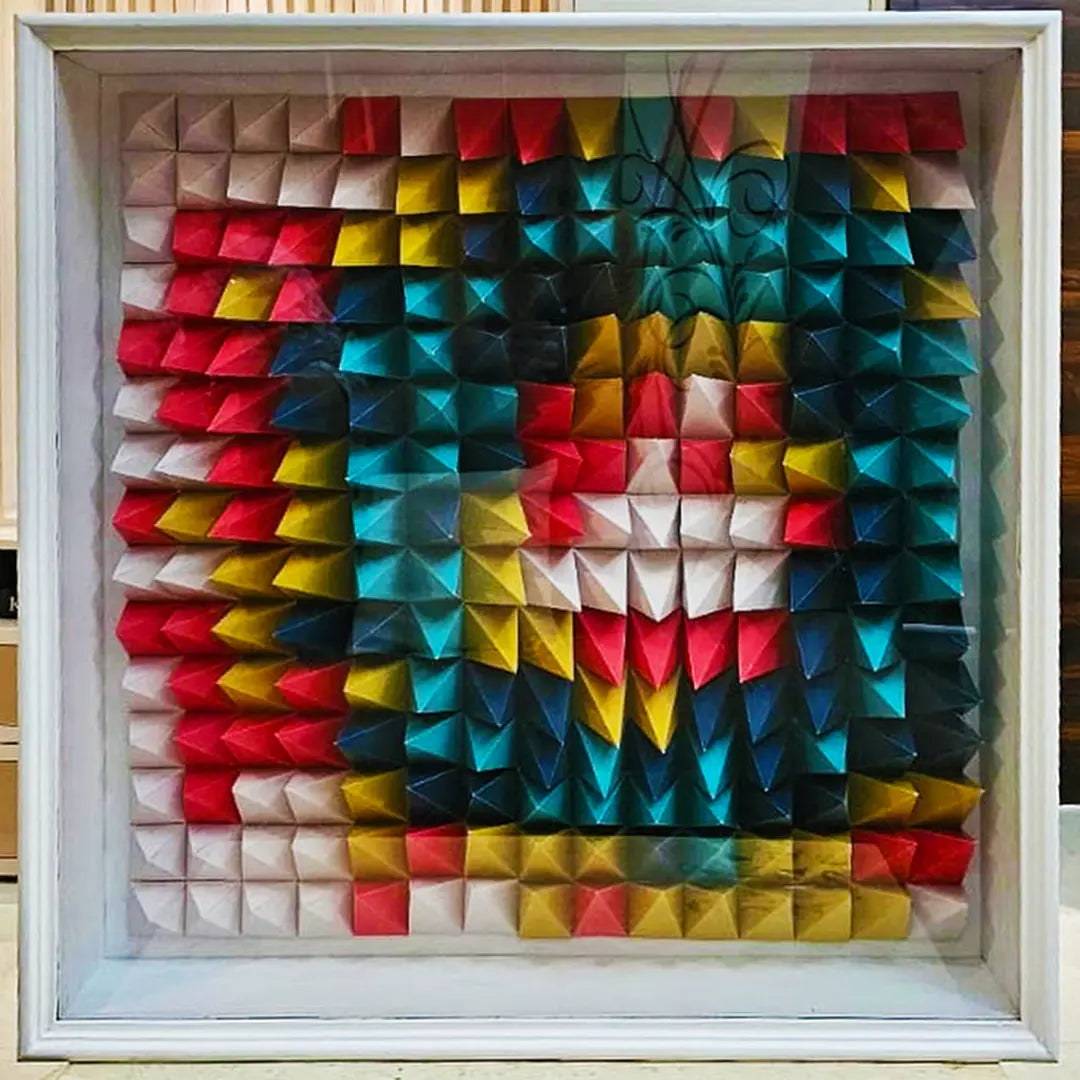
SHADOW BOX
To protect your art from dust, use a shadow box. Read more about dust challenge in this article.